Making simple paper crafts is so much fun, and it can even be soothing. It’s even more enjoyable when they turn into something cute that you can show off.
I made this tiny paper tree not too long ago, and it turned out far better than I thought it would.
You don’t need anything fancy, just some colorful paper glue or a little bit of patience. Thats what I like best.
You can do this craft with kids on a leisurely afternoon or even as a fast school project. And the best thing is.
You may easily change it to make it look pretty and one-of-a-kind. Let me show you how I made mine, step by step.
How Can I turn a Simple Paper Tree Into a Decorative Piece for Home or School Projects?
This is when the real fun starts, to be honest. A simple paper tree is cute on its own, but with a few tiny changes.
You can make it look like something you want to show off. I started by messing around with colors when I constructed mine.
Using varying shades of green for the leaves made it stand out more right away. You can also add small things like coconuts.
Dots, or even glitter if you want to make it more entertaining for youngsters. Putting your tree on a piece of colorful paper.
Or a little piece of cardboard as a base makes a significant impact too. It now seems more like a finished project than merely a craft.
Materials Needed:
- Green paper
- Brown paper
- Black paper
- Red marker /sketch
- Pencil
- Scissors
- Glue
Step-By-Step Guide
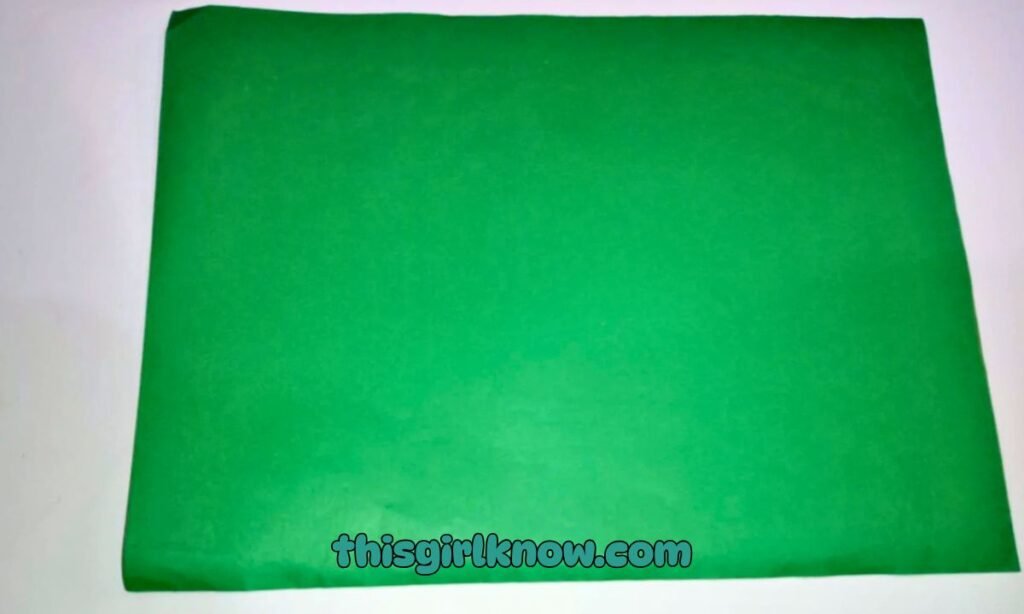
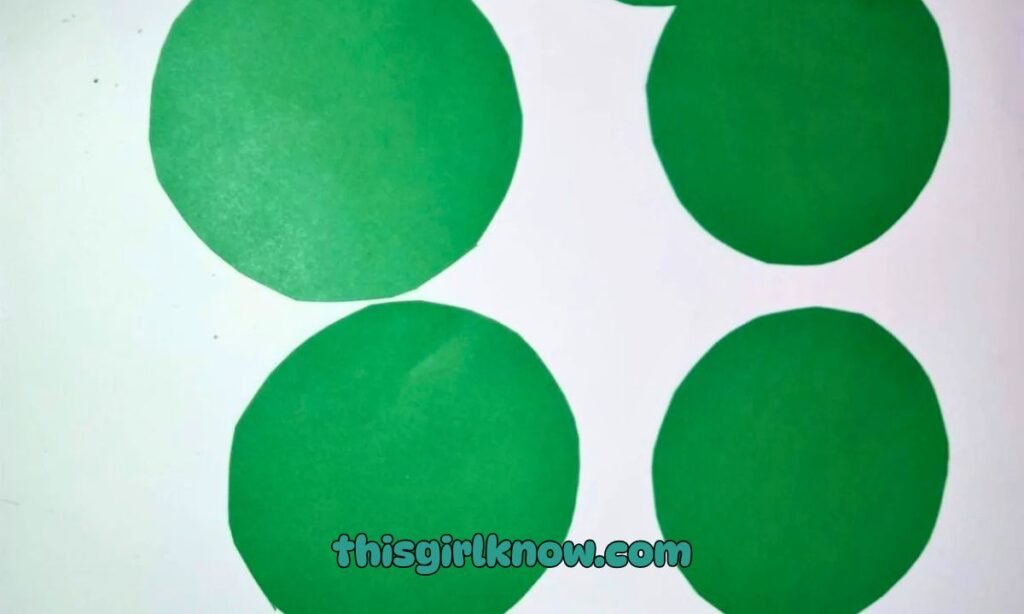
1. Take a green paper sheet
To make the leaves on your tree, start by choosing a green piece of paper. If you’re making it for a school exhibit or a kids’ activity.
I like using a bright green color because it makes the craft appear new and happy. Put the paper flat on your table.
And smooth it out with your hands so there are no bends or wrinkles before you cut it. This will make your leaves seem better later.
If you want the tree to look bigger and more natural, you can also use two different colors of green.
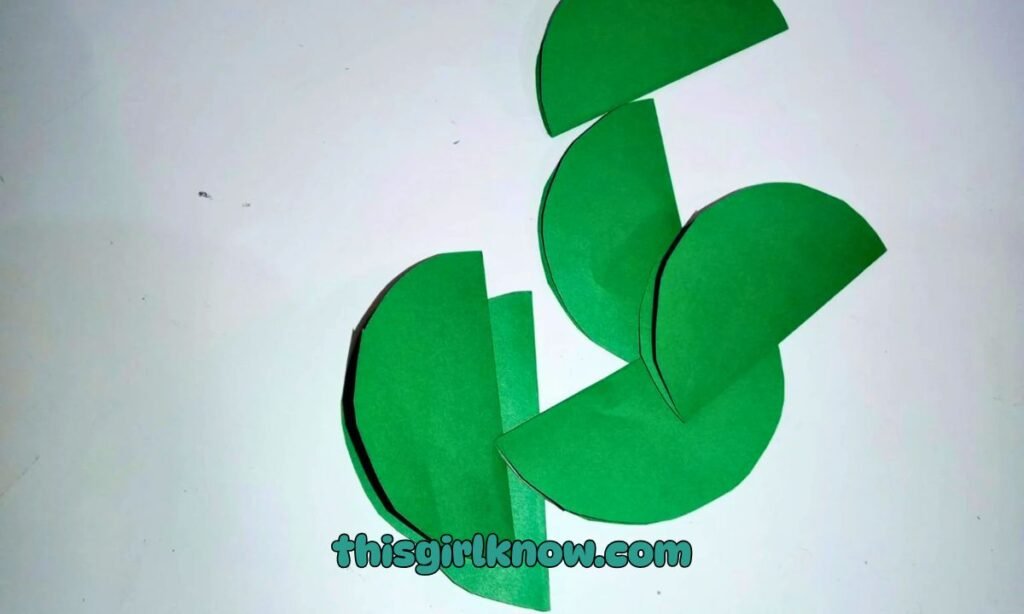
2. Fold or shape it slightly to give a leaf look
To make the green paper pieces look less flat, gently fold or twist them. This little thing makes a great difference.
Since it gives the leaves a delicate, natural contour. You don’t have to have perfect folds; a small bend in the middle or a small curve at the corners would do.
I normally press down very lightly with my fingertips so that the paper stays in shape and doesn’t have severe fold lines.
The idea is to make the leaves look more like they are alive than just cutouts.
3. Cut multiple leaf pieces from green paper
Next, cut out some leaf shapes from the green paper. Like the leaves of a palm or coconut tree, try to make them long and a little pointy.
If they aren’t all the same size, don’t worry. In fact, that makes the tree look even sweeter and more handcrafted.
Cut enough leaves to make a full circle on top of your tree. You can make some leaves longer and some shorter.
And then you can stack them on top of each other later. This makes the upper half look fuller instead of vacant or too plain.
Pro Tip: Fold the green paper once or twice before cutting so you can make multiple leaves at the same time.
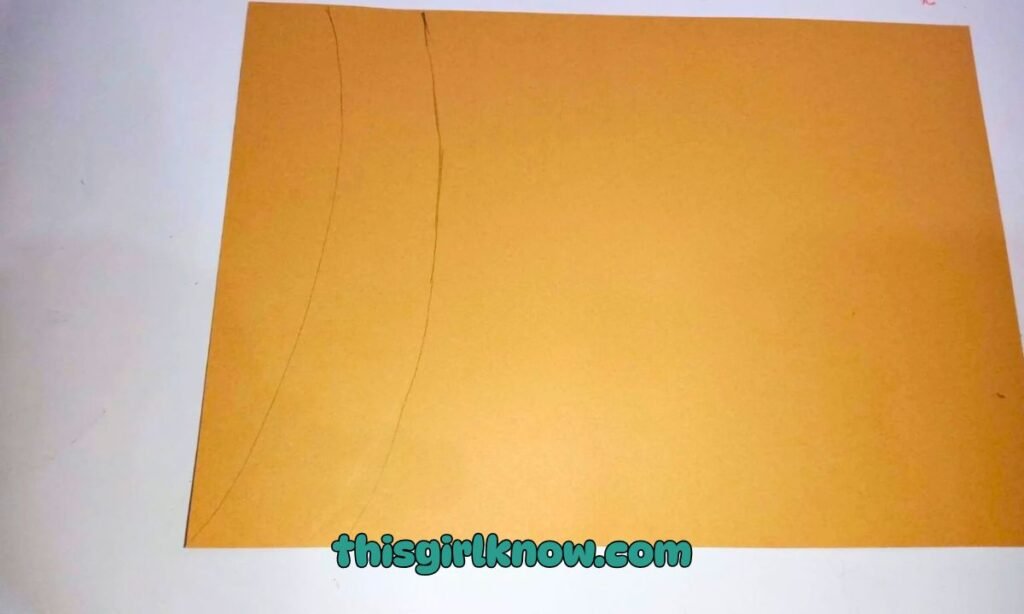
4. Take brown paper and cut a long strip for the tree trunk
Cut a long strip from a brown paper sheet for the trunk. This will be the bottom of your paper tree, so don’t make it too thin.
A strip that is a little wider will make the tree look stronger and more balanced. You can keep it straight or you can bend it a little to make it look more like a tree.
I like a trunk that is a little curled since it makes the craft look less stiff and gives it a nice tropical tree aspect.
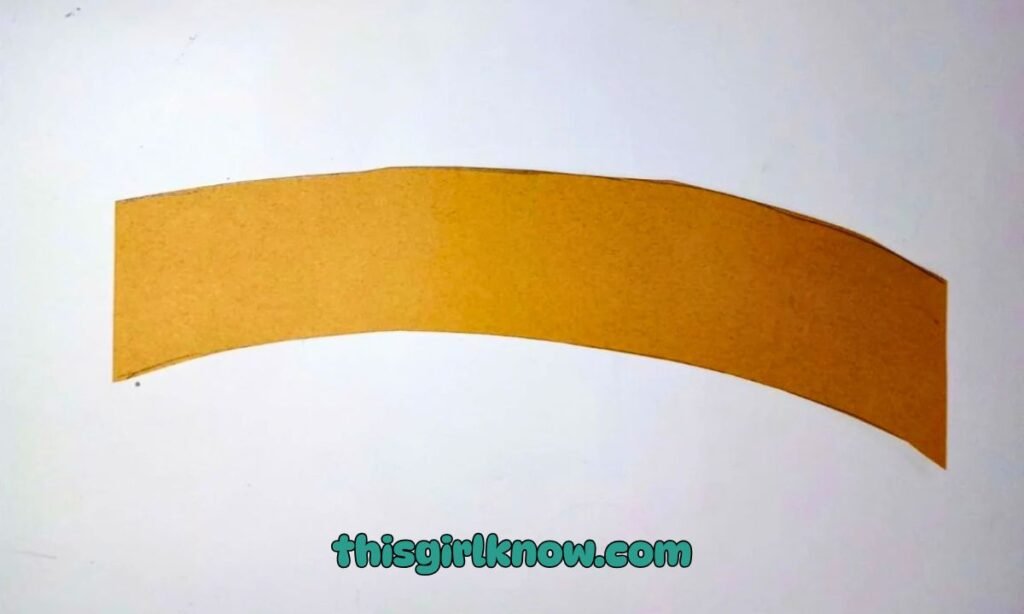
5. Cut the curved strip carefully
After you cut the brown strip, carefully mold it into the trunk shape you want. Take your time cutting if you’re building a curving tree so the edges stay smooth.
You can also make the bottom a little wider than the top to make it look stronger. You don’t have.
To make this section flawless. But cutting it neatly helps make the completed creation look cleaner.
Put the trunk on your background paper once it’s ready and see if the size looks well with the foliage.
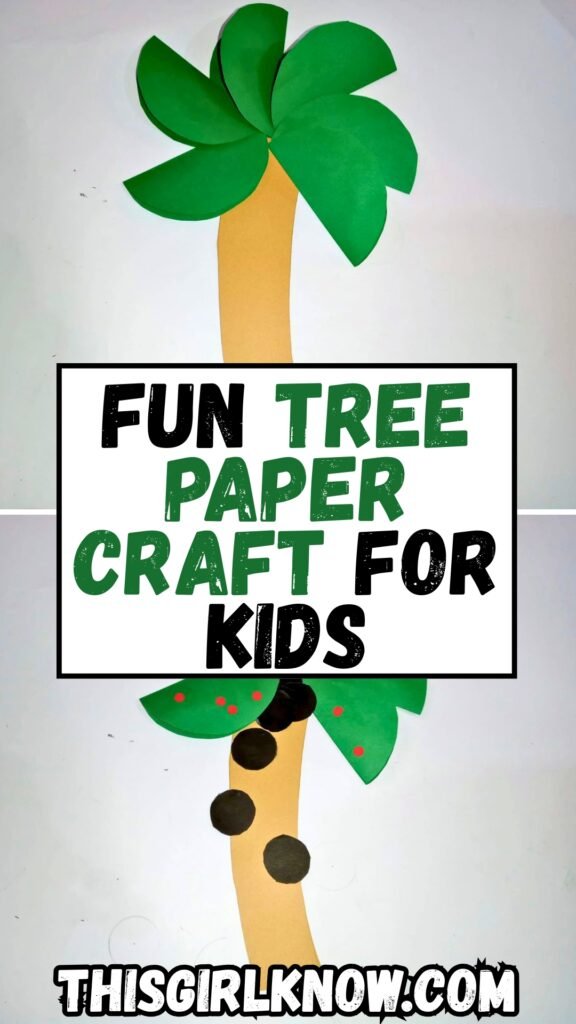
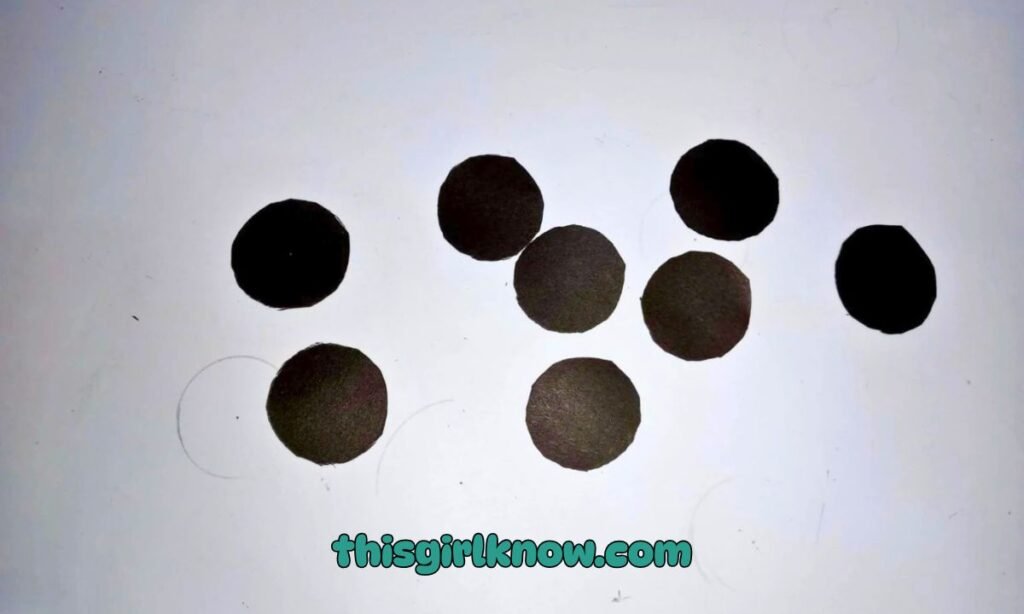
6. Cut small black circles for coconuts
Now, cut out some little circles from black paper to make the coconuts. These don’t have to be enormous.
Little circles look great snuggled amongst the green leaves. You can either lightly draw circles with a pencil first or just cut.
Them out freehand if you’re comfortable with it. I normally cut down three or four coconuts.
Because that looks like enough without making the tree overly crowded. After you’ve arranged the leaves.
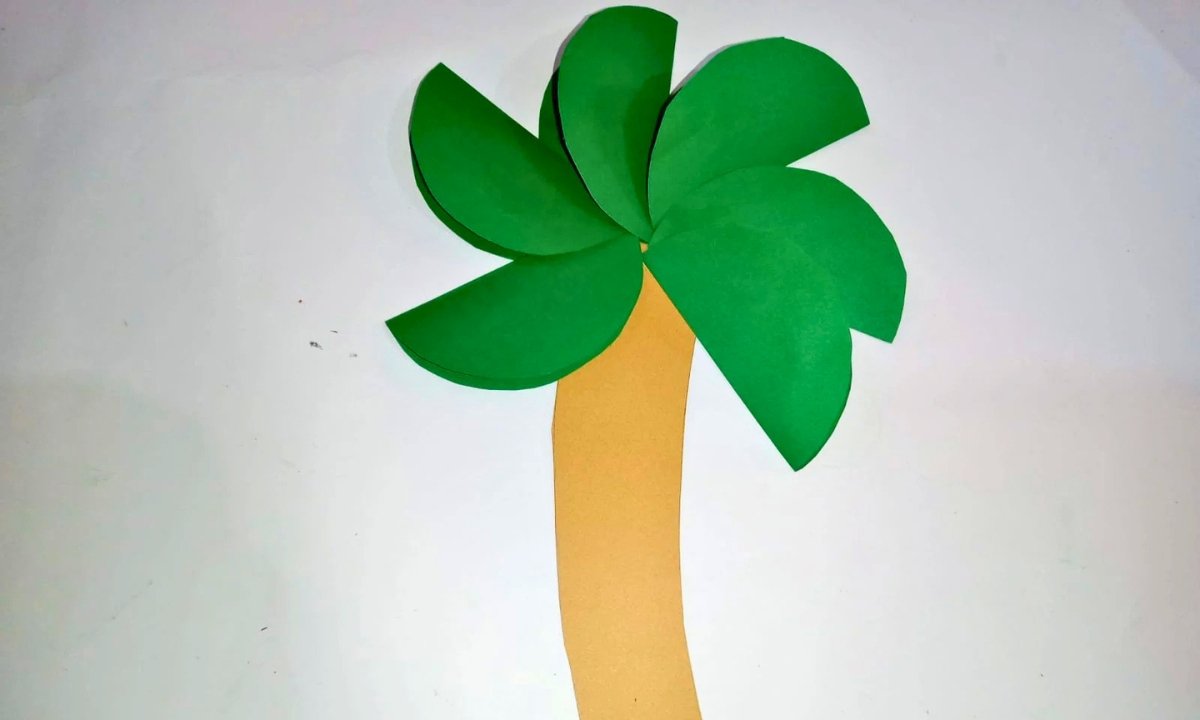
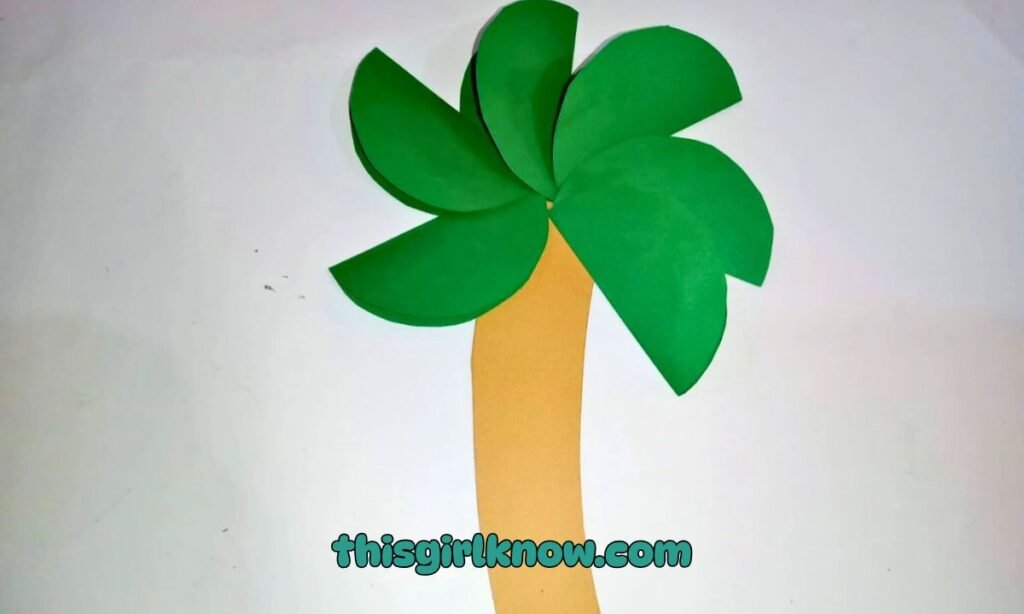
7. Arrange and glue the leaves in a circular shape at the top
Now comes the fun part: putting the top of the tree together. Put the brown trunk at the bottom.
And then start placing the green leaves at the top in a circle or fan configuration. Put the leaves on top of each other in a way.
That makes the top look full and fluffy. Move the leaves about a bit until you like the shape before gluing them down.
Once you’re sure where you want the leaves to go, carefully glue them down. Press down lightly for a few seconds to keep everything in place.
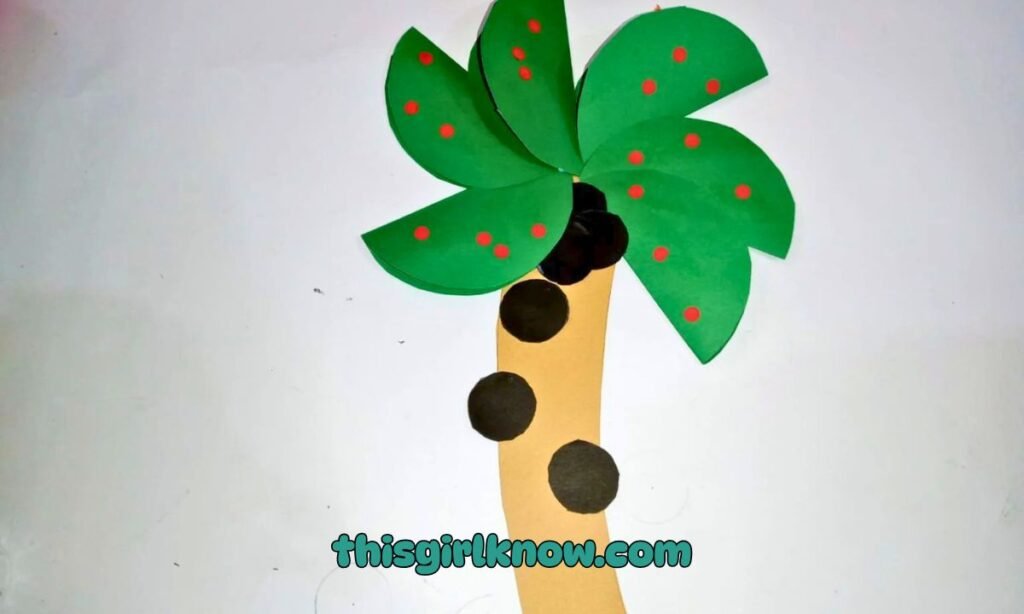
8. Add black circles and draw red dots for decoration
Last, glue the black circles close to the middle of the leaves to make them look like coconuts.
You can then decorate by adding little red dots. This small change makes the tree look more vibrant and interesting.
Which is great for kids’ crafts or school projects. If you want, you can use a red marker, a sketch pen, or even small dots of paper.
Before you move your creation, be sure the adhesive is totally dried. That’s all there is to it. Your basic paper tree is ready to show off.
What Type of Paper Works Best for Making a Sturdy Paper Tree?
The kind of paper you use does important if your paper tree keeps bending or not keeping its shape.
In my experience, craft paper or cardstock that is a little thicker works far better than standard thin printer paper.
It keeps its shape well, especially the trunk and leaves. That being said, you can still make it work with plain paper.
Just be careful when you shape and layer it. For kids’ crafts, I usually stick to colored craft sheets because they’re easy to cut but still sturdy enough.
How Do I Make a Paper Tree Look More Realistic Instead Of Flat?
I always attempt to remedy this because flat paper trees can be a little boring. Adding some depth while you work is the easiest trick.
Instead of making everything flat, bend or curve the leaves a little so they stand out. You may also stack the leaves on top of each other.
Instead of putting them next to each other. This instantly makes the top look fuller and more natural.
I like mixing two hues of green because it makes it look like a real tree without any extra work.
FAQs
Can I make this paper tree craft with kids at home?
Yes, this craft is great for kids! It’s easy, doesn’t need any sharp or complicated instruments, just basic cutting and gluing.
And it lets kids be creative with colors and embellishments. If you’re doing this with little kids.
You may cut out the hard pieces like the trunk or leaves ahead of time and let them do the fun part, which is arranging and decorating.
How can I store or preserve my paper tree craft for longer?
Put your paper tree on a strong base, such cardboard, so it doesn’t bend easily. This will help it look great.
You can also keep it in a dry spot where it won’t get wet, since paper can get wrinkled or ruined.
Using a plastic sheet to cover it gently or putting it in a folder might help keep it safe from dust and damage if it’s for a school project or display.