
Dinosaur Paper Craft Tutorial That Kids Will Love Making
We had one of those “we need something fun right now” afternoons last weekend, and that’s how this little dinosaur paper craft came to be.
I got out some colored paper, markers, and glue, and to be honest, I didn’t think much of it.
But it turned out so cute, and even better, it kept the kids busy and happy for a long time.
One thing I like about this craft is how easy it is. You don’t need any special tools or intricate steps just a fun.
Creative activity you can do together at the table, even if things get a bit dirty. This one is a sure winner if your kids adore dinosaurs as much as mine do.
Let’s jump in!
How Do You Make a Dinosaur Paper Craft That Actually Stands Up?
If you’ve ever produced a paper project that falls apart as soon as your child attempts to play with it.
You know what I’m talking about. Giving your dinosaur a little extra support is the key to making it stand up.
I found that using slightly thicker paper, such cardstock, makes a big difference right away when I made ours.
Adding a simple base, like folding a little flap at the bottom of the legs or gluing the dinosaur to a strip of folded paper.
To make a stand, is another quick remedy. When you cut out the shape, you may optionally make the feet a little wider.
It doesn’t have to be perfect; it just needs to be strong enough to handle small hands.
Materials Needed:
- Colored paper
- Pencil
- Scissors
- Glue
- Black marker
Step-By-Step Guide
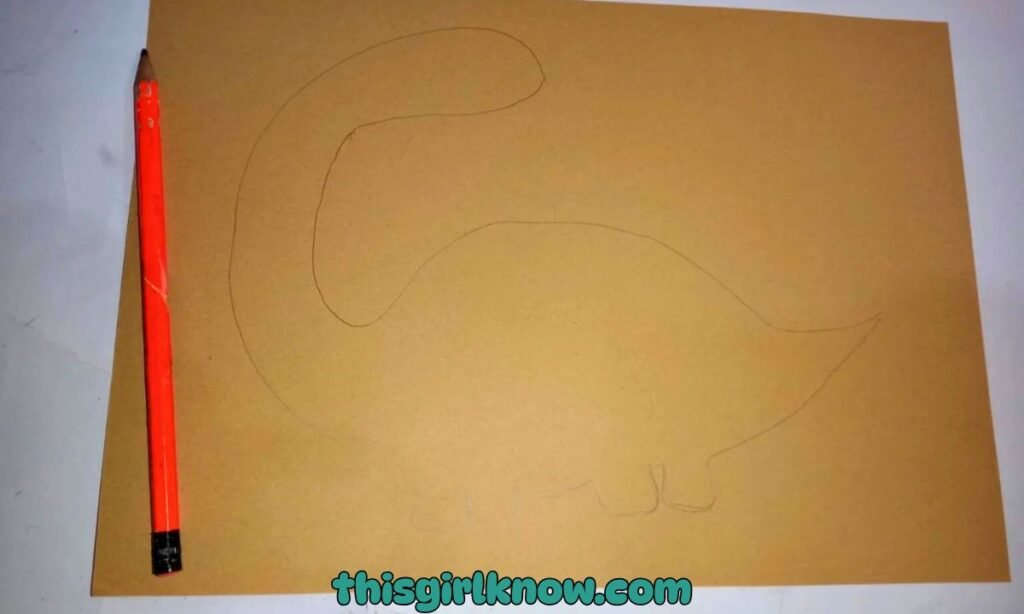
1. Draw and Cut Dinosaur Shape
Draw a simple dinosaur shape on a piece of colored paper to get started. You can construct it as simple.
Or as complicated as you want, but if you’re doing this activity with little kids, a simple rounded body, tail, and legs are perfect.
Carefully cut out the shape once it’s ready. This is the most important portion of your craft, so take your time.
I try to make the pattern big enough so that kids can easily add their own touches afterward.
If your child wants to participate but cutting is hard, you can draw the shape first and then let them do the easy snips around the edges.
Pro Tip: If you want the dinosaur to be sturdier and stand better, use cardstock instead of thin paper.
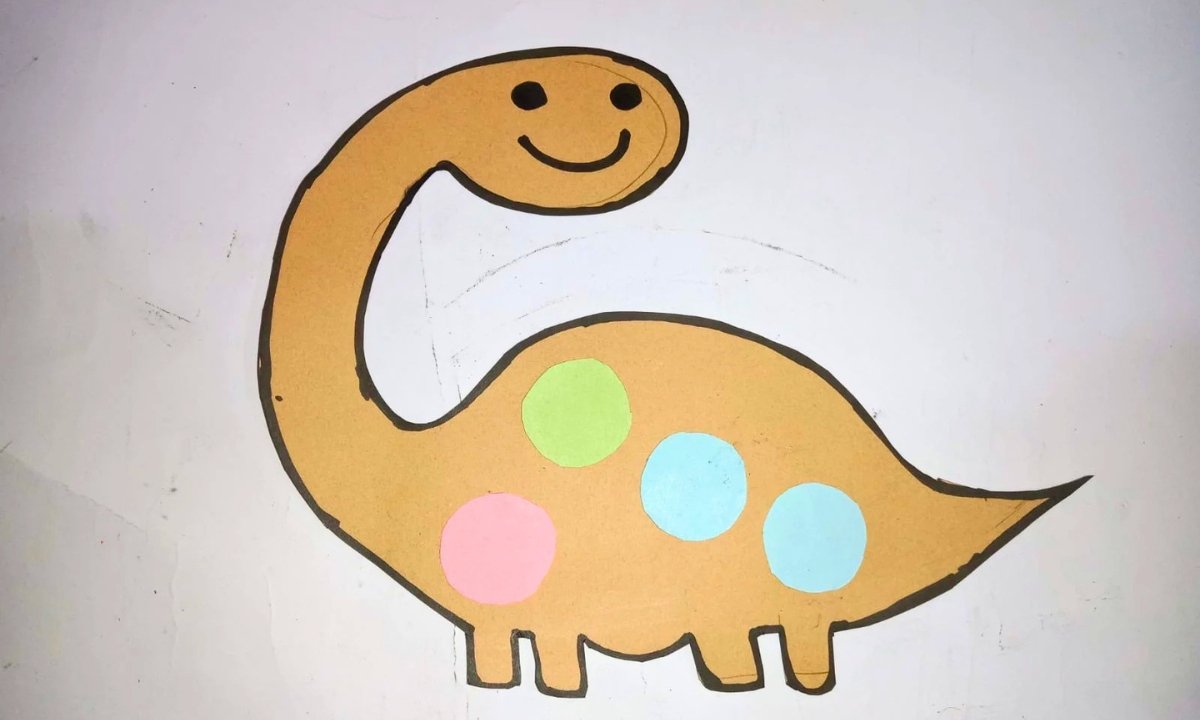
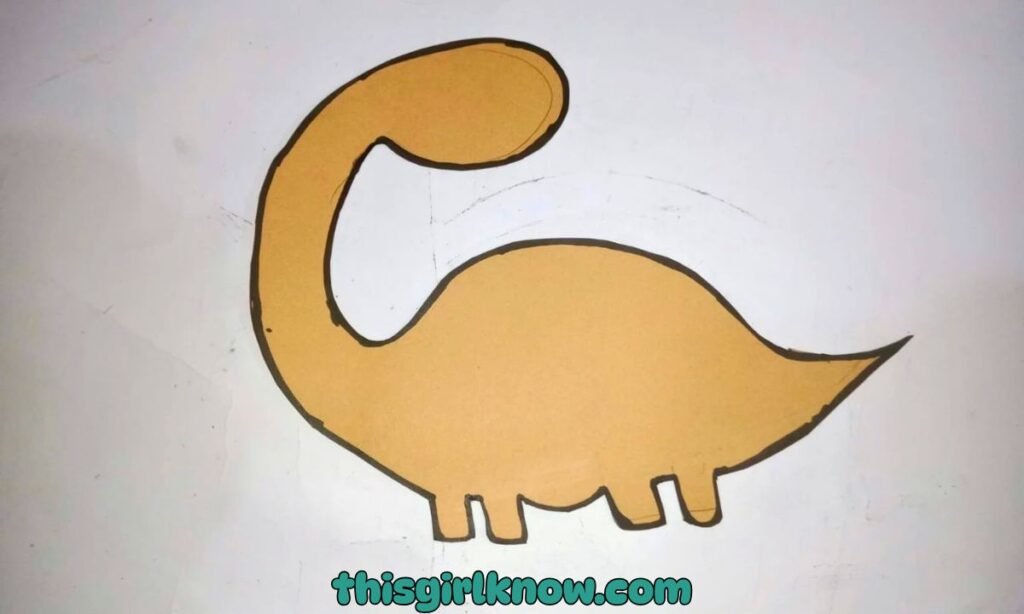
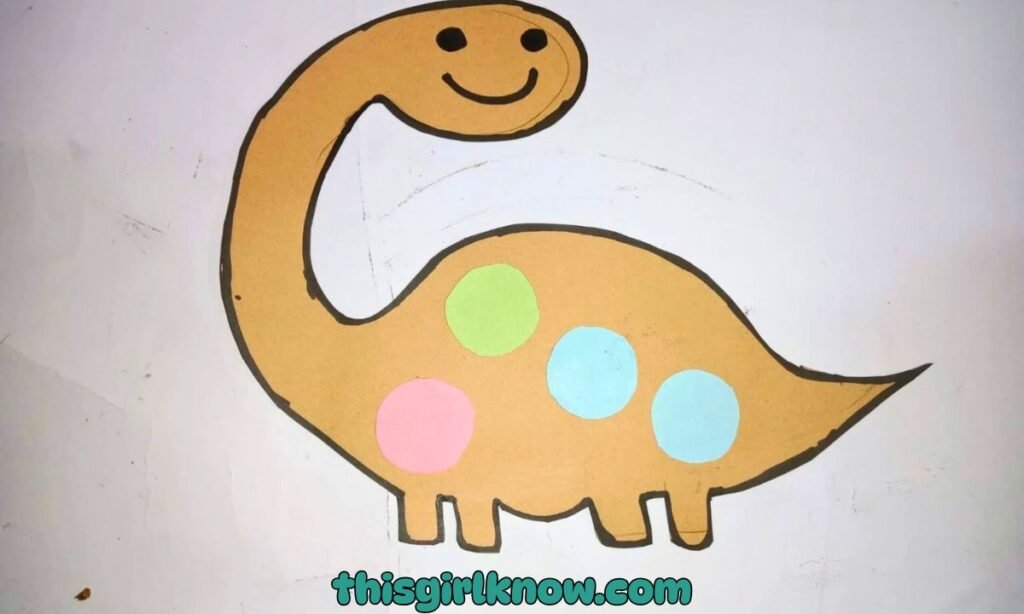
2. Add the Outline and Face Details
It’s time to use a black marker to make your dinosaur shape come to life now that it’s cut out.
To make the dinosaur shape pop out more, trace around the edges. Then, add the minor features like the eye, smile, and any other lines you desire.
This is the point where the project starts to show its personality, and youngsters usually get the most thrilled about it.
Some people would want their dinosaur to look cheerful, while others might want it to look stupid or tired.
Everyone can accomplish this stage in their own way, which makes it entertaining and stress-free.
3. Decorate the Body
Cut out little circles from papers of different colors and glue them to the dinosaur’s body to make it look more interesting.
You can put them all over the back, along the tail, or wherever else that looks cute. This is a great technique.
To make the dinosaur bright and fun without making the activity seem too hard. The décor took the longest.
Because the kids had so many ideas once they started picking colors. If your paper is light and bends readily.
Give the glue a few minutes to cure before moving the craft around too much.
Why Is My Dinosaur Paper Craft Falling Apart So Easily?
Don’t panic if your dinosaur keeps ripping, twisting, or falling apart. It’s a very common problem.
I had this problem the first time we tried it too, especially when the kids were overly eager. Most of the time.
The problem is that you used too much glue or thin paper. When it becomes wet, regular paper becomes fragile and easy to tear.
Changing to thicker paper, such cardstock, might make a major effect right away.
Also, use little amounts of adhesive instead of giant lumps. Gently press the pieces together.
And give them a minute to stick. A little patience here actually helps everything stay together longer.
What’s the Easiest Dinosaur Craft for Kids Who Struggle with Scissors?
You’re not the only one whose youngster doesn’t like cutting or who gets upset after a few snips.
The easiest way to make this dinosaur activity easier for beginners is to make the cutting part very easy or leave it out altogether.
You can sketch and cut out the primary dinosaur shape, and then let your youngster decorate it.
You might also use pre-cut shapes like circles, stickers, or even ripped-up pieces of paper instead of ones that are cut perfectly.
To be honest, dinosaurs made of torn paper can be just as cute and a lot less stressful. The point is to have fun, not to be perfect.
What actually important is that youngsters love the craft more when they feel like they are doing well.
FAQs
Can I make this dinosaur craft using recycled materials?
Absolutely! In fact, this is one of my favorite ways to do it. You can use old magazines, cereal boxes, or leftover craft paper instead of new supplies.
Cardboard from packaging works especially well if you want your dinosaur to be extra sturdy.
It’s a great way to teach kids about reusing things while still having fun. Plus, it adds a bit of creativity.
Because every dinosaur ends up looking a little different depending on what materials you have at home.
How long does this dinosaur craft usually take to complete?
Based on what I’ve seen, this craft takes 20 to 30 minutes, depending on how much detail your youngster wants to add.
Kids can rapidly make the basic design and add decorations, but they typically want to spend more time.
Adding colors and other details. If you’re making anything with little kids, you might want to do it in shorter steps.
You can make it as easy or as hard as you like, depending on how much time and energy you have.
Hi, I’m Afaf! I’m a law student who loves writing about everyday life – from home projects and crafts to fashion, beauty, and parenting tips.
I’ve been writing for over a year, sharing ideas that are simple, practical, and easy to try. I write about things I find interesting and useful, whether that’s organizing a space, trying a new DIY, or finding activities to keep kids entertained.
My goal is to share helpful ideas without making things complicated. If it works in real life, I’ll write about it.
When I’m not studying or writing, I’m usually experimenting with new projects or scrolling for inspiration!