This sunflower paper craft is a great way to brighten your day straight away if you want to do something fun and easy.
I made this lately on a peaceful afternoon, and it turned out to be one of those projects that seems much harder than it is my fave sort, to be honest.
I really liked how easy it was to make these sunflowers. All you need is some paper, some folds, and some cutting.
And you have these pretty little flowers that you can use to decorate, make cards, or even do projects with kids.
In this article, I’ll show you step by step how I made mine, along with some suggestions I picked up along the road like what I will do differently next time.
Let’s jump in!
What Is the Easiest Way to Make Sunflower Petals Look Realistic?
If you’ve ever constructed paper flowers and thought, “This doesn’t look like a sunflower,” you’re not the only one. I felt the same way the first time I tried this.
The answer to making sunflower petals look real is not to make them perfect, but to give them a shape and a little bit of variance.
Instead of cutting petals that are exactly the same, try making the tips of the petals a little curled or pointed.
It made a huge difference right away when I started adding a little curvature to my petal shape.
Don’t worry if not all of the petals are the same size. That little flaw helps it look more real. After I opened the paper.
I also found it helpful to bend the petals out a little. It produces the same delicate, “blooming” look that actual sunflowers do.
Material Needed:
- Colored paper
- Pencil
- Scissors
- Glue
- Ruler
Step-By-Step Guide
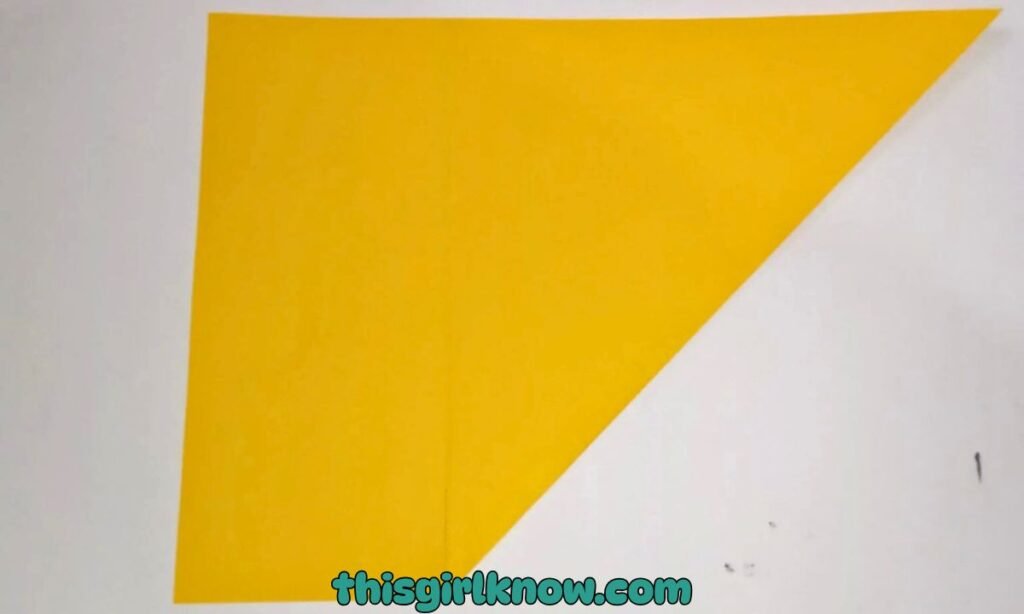
1. Square Paper and Fold It
Start with square piece of paper and the fold it in half diagonally from one corner to other to make a triangle.
Try to line up the edges as best you can. This will make the petals look more even later on.
I like to press down hard on the fold with my fingertips so that the crease is beautiful and sharp.
This first fold is very easy, but it really sets up the shape of the flower, so it’s worth spending your time to make it right instead of hurrying through.

2. Check the Center Crease
Now open the paper back up and look at the line that runs across the middle. That line is going to help you with the next folds.
So make sure you can see it well. Just fold it again and press down a little harder if the crease seems too soft.
I always do this since it makes the remainder of the steps much easier and less complex.
It might seem like a small thing, but the completed sunflower looks much better with neat folds.
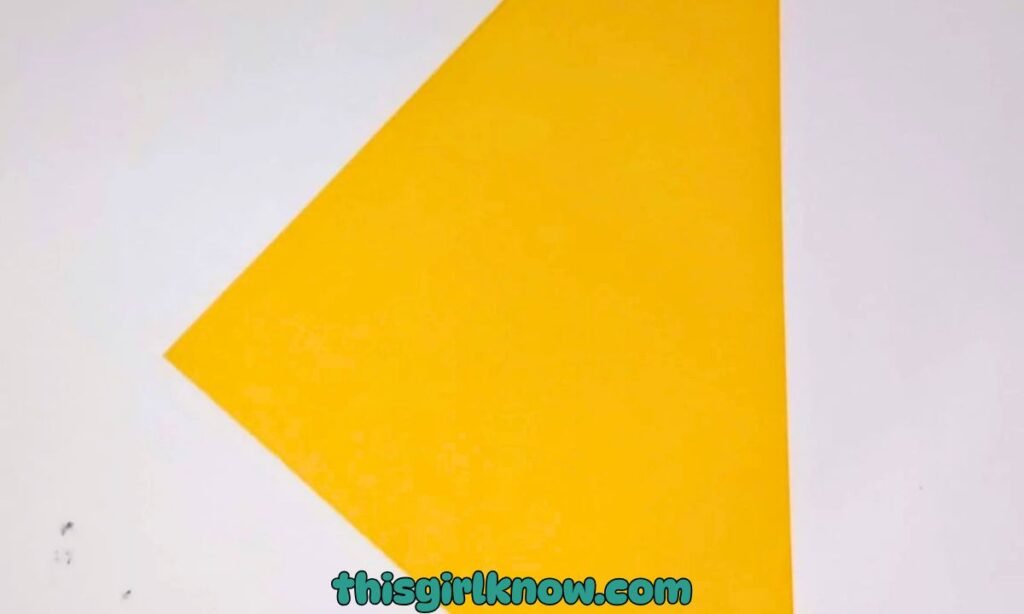
3. Fold Again Into a Triangle
After checking the central crease, fold the paper diagonally again to make it look like a triangle again.
This second fold should be easy given that the paper has that guidance in place. To keep the layers uniform, try to keep the corners lined up well.
I observed that taking an extra second here made everything seem better when I started cutting my.
At this point, you’re basically making the basis for your petals, so it’s more important to be neat than to be quick if you want the flower to open smoothly.
Pro tip: Hold the corners together first, then smooth the fold from the top down for better alignment.
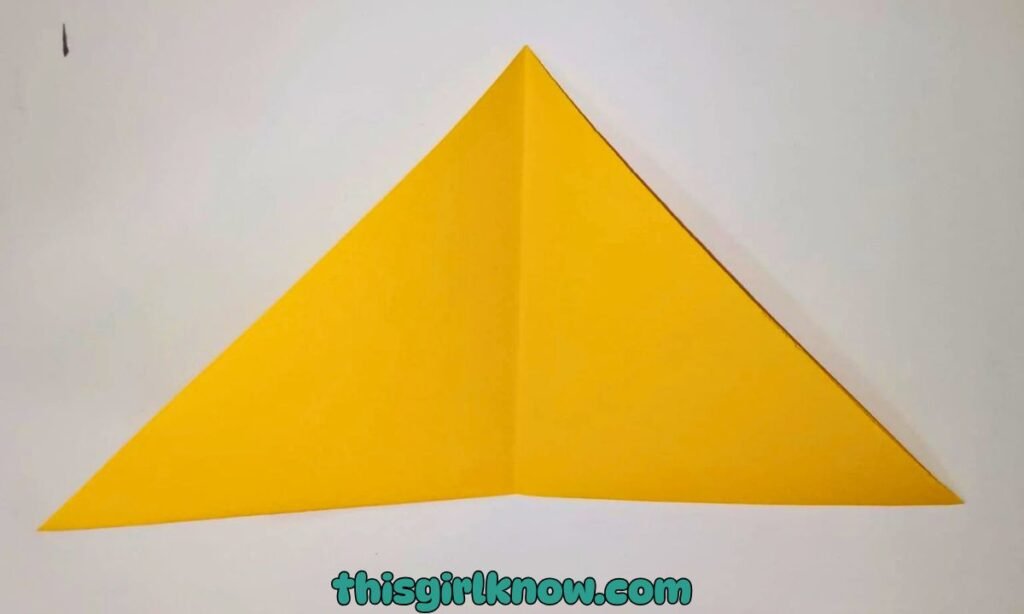
4. Fold the Triangle in Half
Next, fold your triangle in half again to get a smaller triangle with a clear center line. This fold helps you form the flower evenly.
And shows you where the petal design will go better. Don’t crush the paper too hard; simply form a nice, strong crease.
I always think this is the point when the craft truly starts to come together. You can already see.
The floral shape starting to form behind all those layers, even though it’s still simply folded paper.
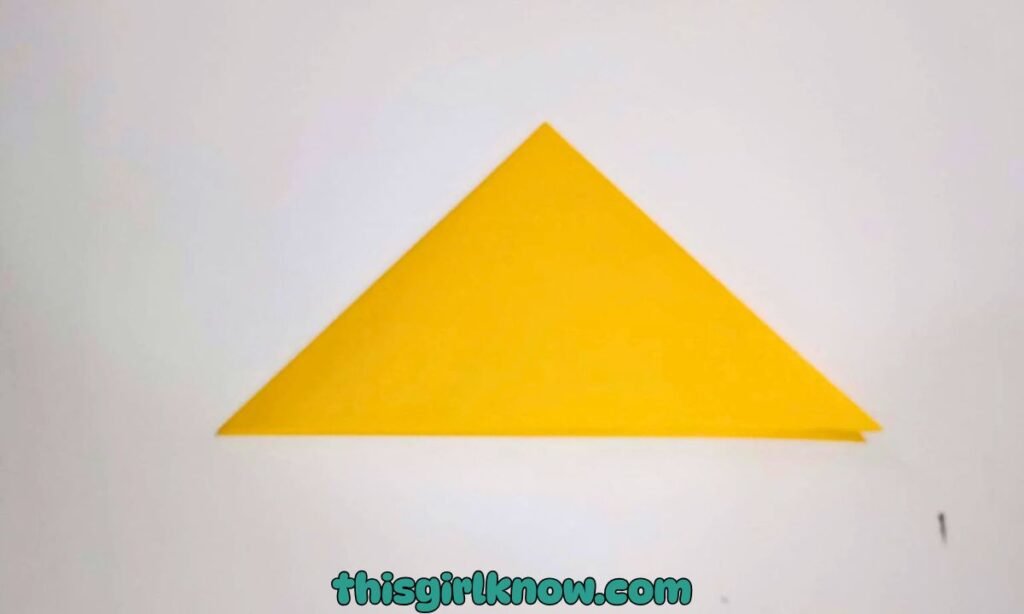
5. Fold Again to Make Smaller Triangle
Now fold the paper again, this time making a triangle that is much smaller. Your paper will now have numerous layers.
So just make sure the edges stay as straight as possible. You may cut numerous petals at once with this smaller folded shape, which saves you a lot of time.
I really enjoy this portion since it reminds me of one of those simple DIY hacks that makes things easier without needing anything special.
Don’t worry if it appears big; just maintain the fold tight and easy to handle so you can draw and cut easily next.
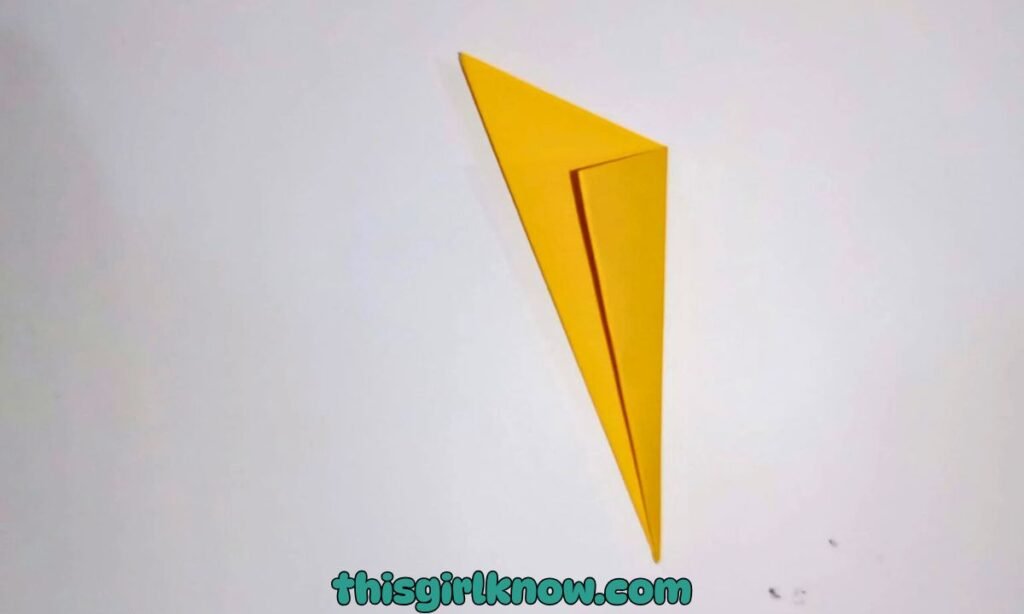
6. Fold One Side Over
Fold the triangle in half and then bring one edge over so that it looks like a cone. The first time you do this.
It might seem a little strange, but after you get it in the right place, it makes sense. The idea is to make a folded shape.
That will give you petals that are spherical when you cut it open. I recall changing mine a couple of times until I loved how it looked.
So don’t worry if it doesn’t look great the first time. Just make sure the folded layers stay in place and that the shape feels balanced in your palm.
7. Draw a Curved Petal Shape
With a pencil, create a curving petal form around the edge of the folded paper. You can really start to decide how your sunflower will look here.
I like to make the tip a little round or soft pointy since it makes the petals look more real.
Don’t think too much about the drawing; simply keep it simple and flowing. Because the paper is folded.
Whatever you create here will show up again when the flower opens. That’s why I usually choose a smooth, soft curve over something overly elaborate.
Pro tip: Draw lightly with pencil first so you can erase and adjust the petal shape if needed.
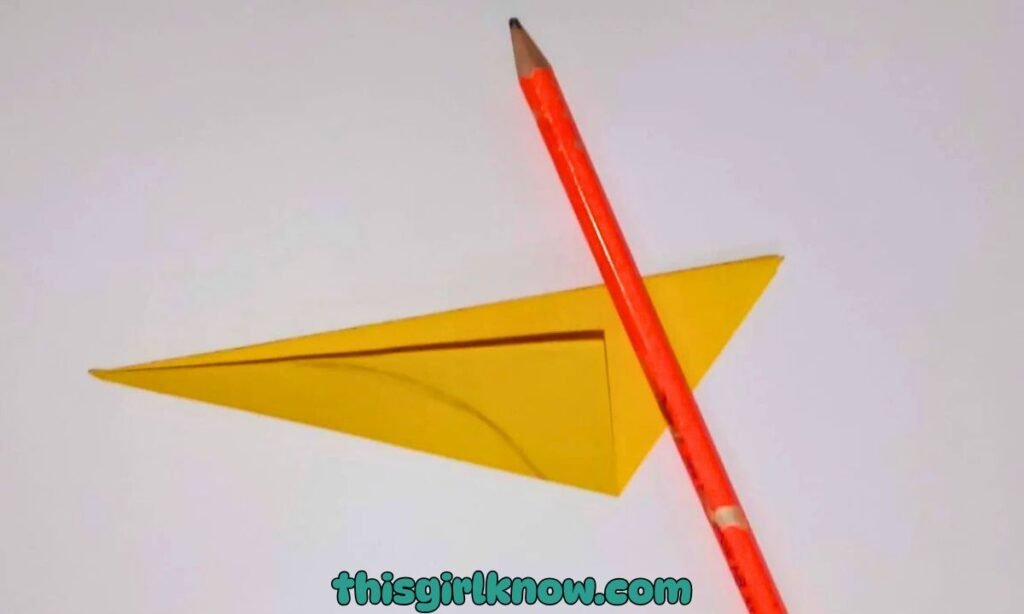
8. Cut Along the Shape
Cut carefully along the outline of the petal you created making sure to leave the folded edge where it needs to be so the flower stays together.
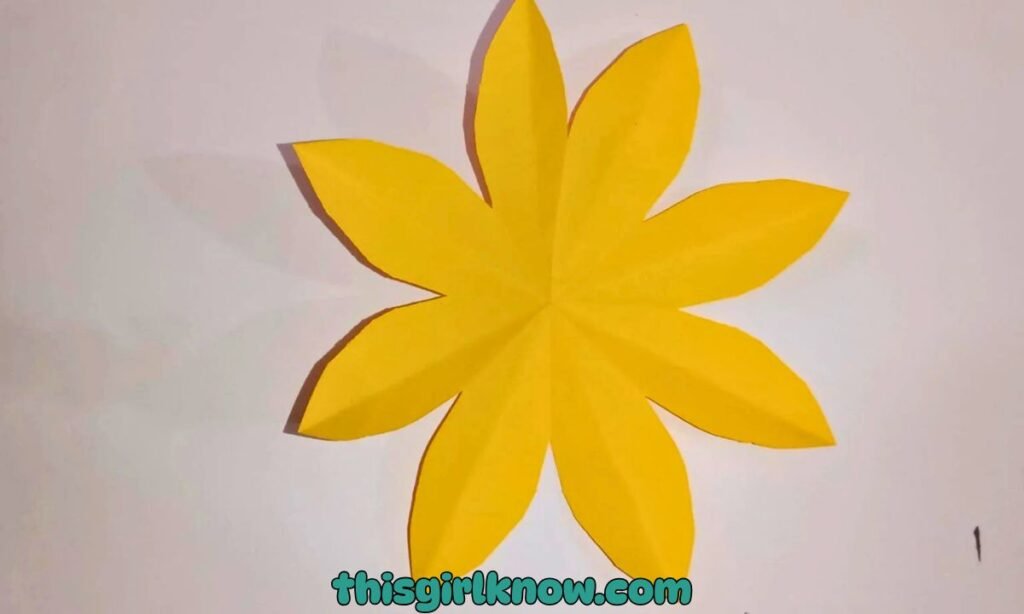
After you finish cutting, slowly open the paper and you’ll see the flower shape start to show up.
This is honestly the best part because all those folds suddenly look nice. When I initially opened mine, I thought, “Okay, this is really cute.”
Don’t worry if a petal seems a little uneven; minor flaws frequently make handmade flowers look much more beautiful and natural.
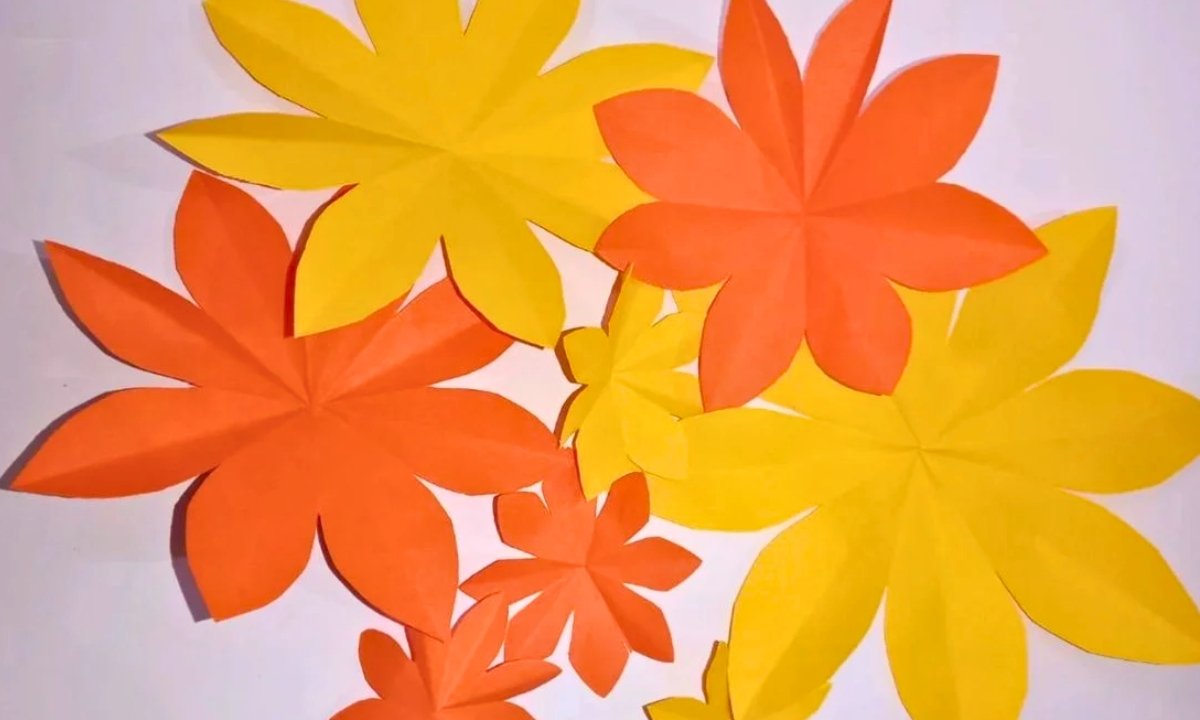
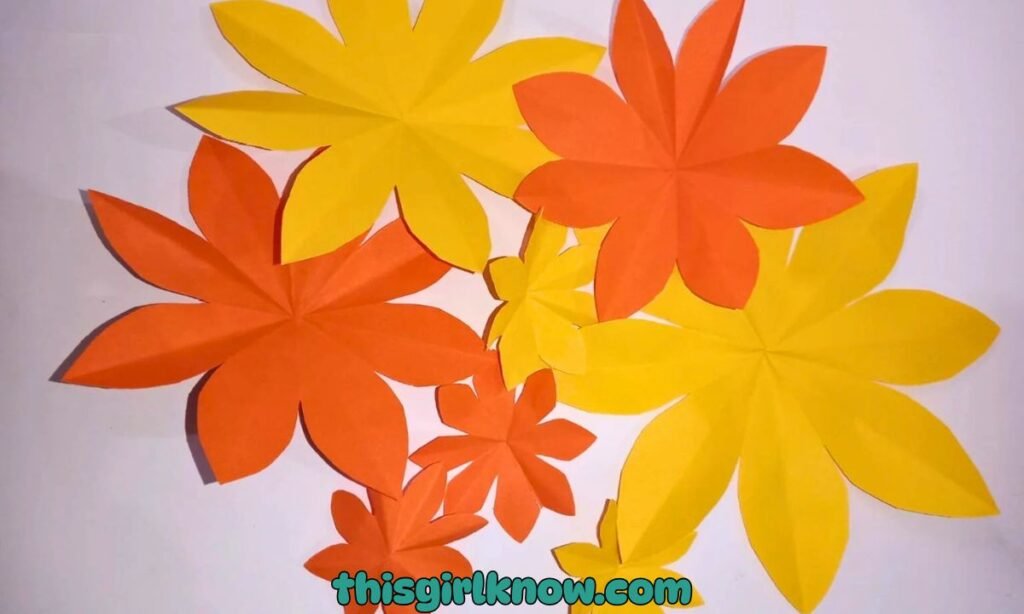
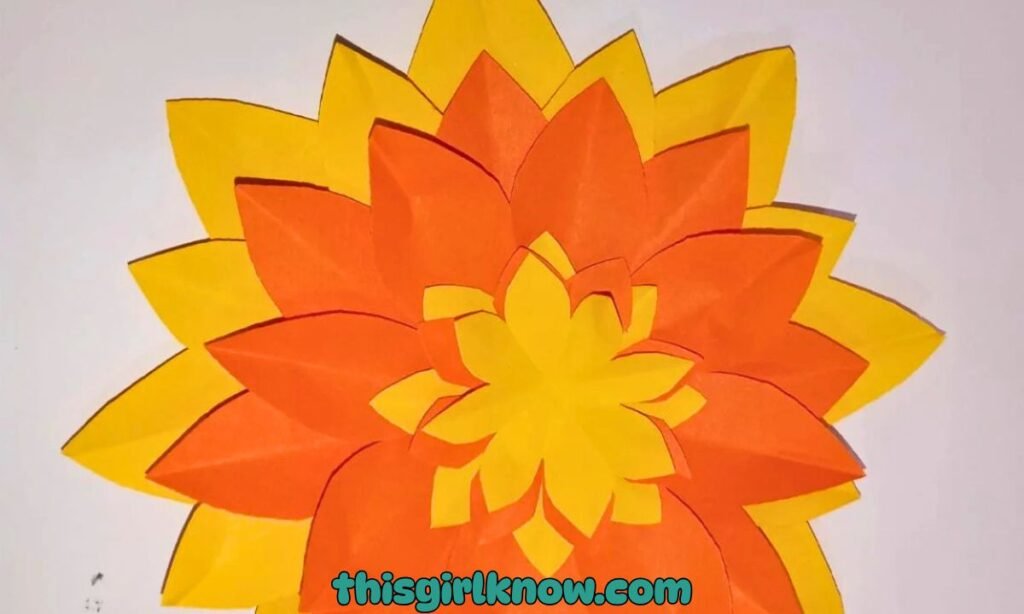
9. Repeat With Different Colors and Sizes
To make more flower layers, do the same thing again using paper in different colors and sizes.
This phase is what really makes your sunflower look full and interesting. I like to mix a bright yellow with a darker gold color.
Because it makes the flower look more three-dimensional without being hard to do. You can even make one layer a bit smaller.
The whole creation looked so much better and more polished until I started stacking different sizes on top of each other.
10. Assemble and Complete the Sunflower
To finish the flower, arrange the layers of paper flowers from biggest to smallest and glue them together in the middle.
To make the sunflower look fuller and more natural, turn the top layer a little so that the petals don’t sit directly on top of the bottom layer.
If you want greater depth, you can gently fluff or bend the petals up a little. Once everything is glued down.
You can add the center of the sunflower with paper, a button, or any other craft item you prefer.
This is the step where everything comes together, and it’s such a nice little ending.
Why Are My Sunflower Petals Not Holding Their Shape?
Don’t panic if your sunflower petals keep falling flat or losing their shape. This happens a lot and it happened to me the first time too.
Most of the time, it depends on the kind of paper and how the petals are treated once they are cut.
Thin paper tends to droop over quickly, which makes the petals look dead. When I switched to slightly thicker craft paper.
I could tell a tremendous difference. It kept its shape so much better without any more work.
Another factor is that the petals need some support after the flower opens. To get that natural “bloomed” look, gently bend or curl them out with your fingertips.
How Do You Make a Paper Sunflower Look More Creative or Unique?
This is the fun part: putting your personal touch to the basic sunflower to make it feel special.
I started out basic when I constructed mine, but then I tried with other colors and layers, and it made a big impact.
Instead of using just one shade of yellow, try blending two or maybe adding a little orange around the edges.
You can even try out alternative cores, like brown paper, buttons, or even small beads to give the illusion of texture.
Instead of stacking the petals perfectly, you may perhaps just slightly offset each layer. That little tweak makes the sunflower look more full and genuine.
FAQs
Can I make a sunflower paper craft without folding so many times?
Yes, you can do that! If you think the folding procedures are too hard, especially for kids.
You may just draw and cut out each petal and glue them around a circle foundation. It takes a little longer.
I’ve tried both techniques, and to be honest, this one works excellent when you want to do crafts without any stress.
How long does it take to make a paper sunflower from start to finish?
It normally takes 15 to 25 minutes, depending on how much detail you want on your sunflower.
The first one could take a little longer while you learn how to fold it, but after you do, it goes lot faster.
Because I already knew what to do, the second flower took roughly half as long as the first one. It’s a really wonderful craft that doesn’t take long to accomplish.