
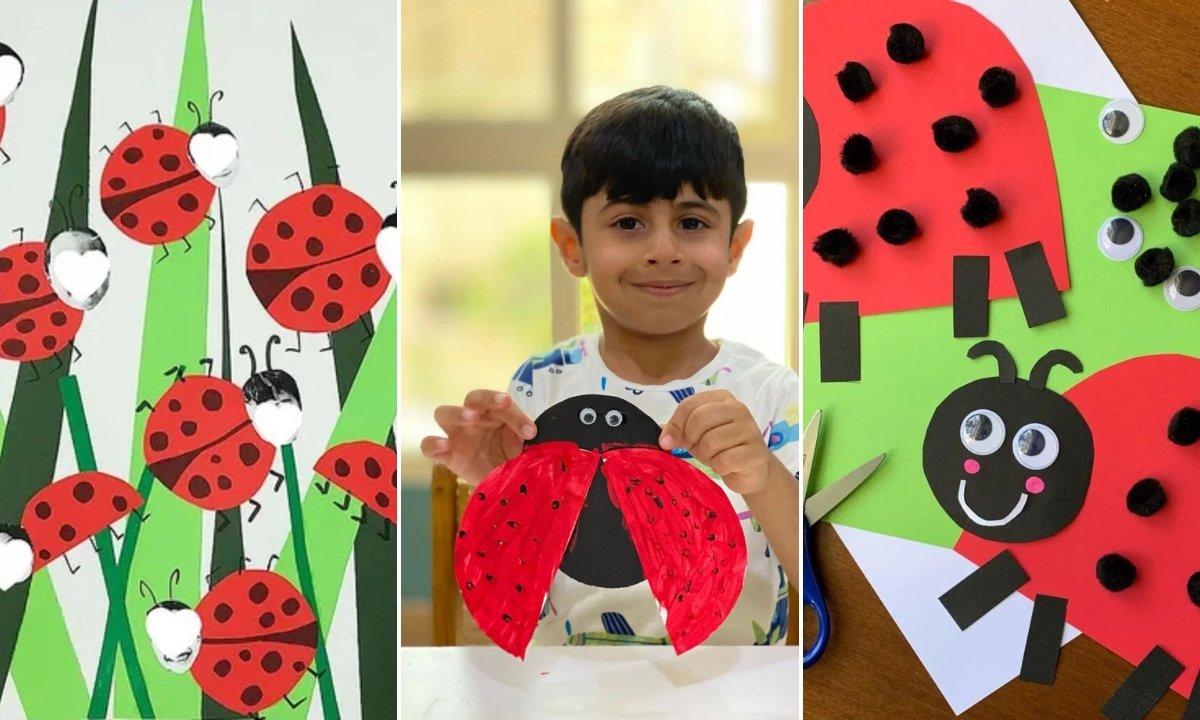
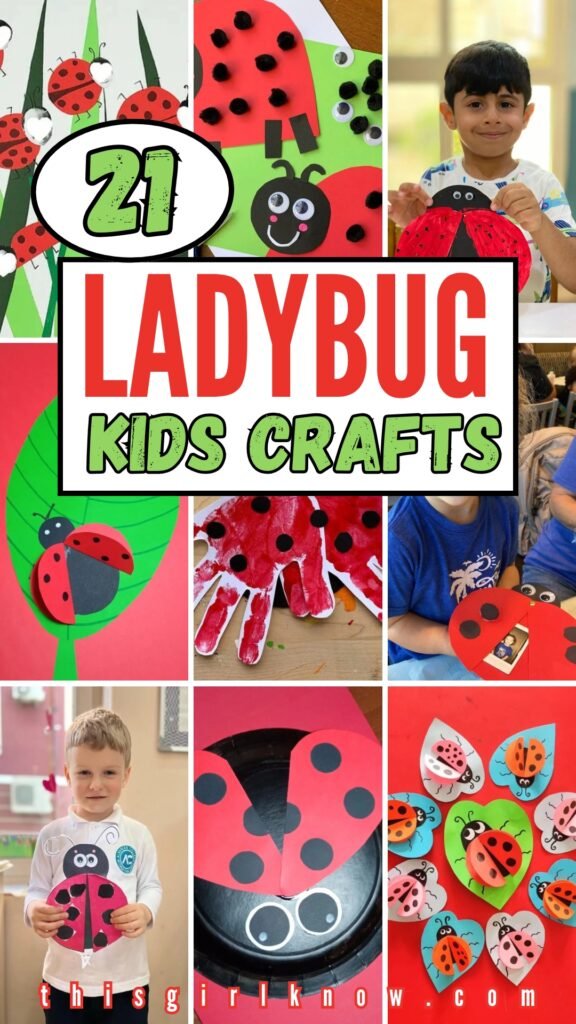
21 Ladybug Craft Ideas For 2026
You already know what the problem is if you’ve ever given a youngster scissors and watched their fingers freeze.
Online crafts look easy, but when kids try them at home or in class, they have trouble cutting, glue runs everywhere.
And the activity becomes frustrating instead of educational. Not every cute project, to be honest, helps little hands develop stronger.
In this article, I’m sharing 21 creative Ladybug crafts kids can enjoy during weekends or free time in 2026.
Let’s jump in!
How Do You Create Ladybug Crafts That Help With Fine Motor Skills?
To make ladybug crafts that really help with fine motor skills, you have to pay attention to what you’re doing, not how it looks in the end.
Cutting, tearing, pinching, sticking, and pressing are all ways to make the muscles in your hands stronger.
You let the kids do the hard portions instead of doing them for them, even if it looks untidy. You can convert a simple ladybug craft.
Into meaningful exercise that increases control and confidence by breaking it down into easy steps and picking assignments that are right for their skill level.
Save this article for later!👇👇👇
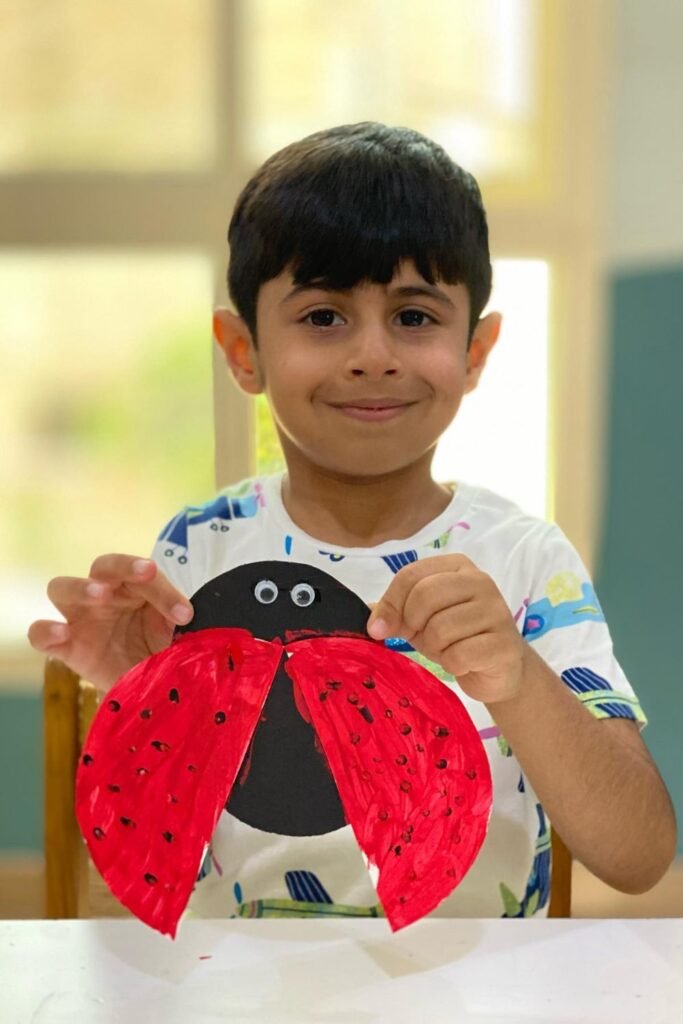
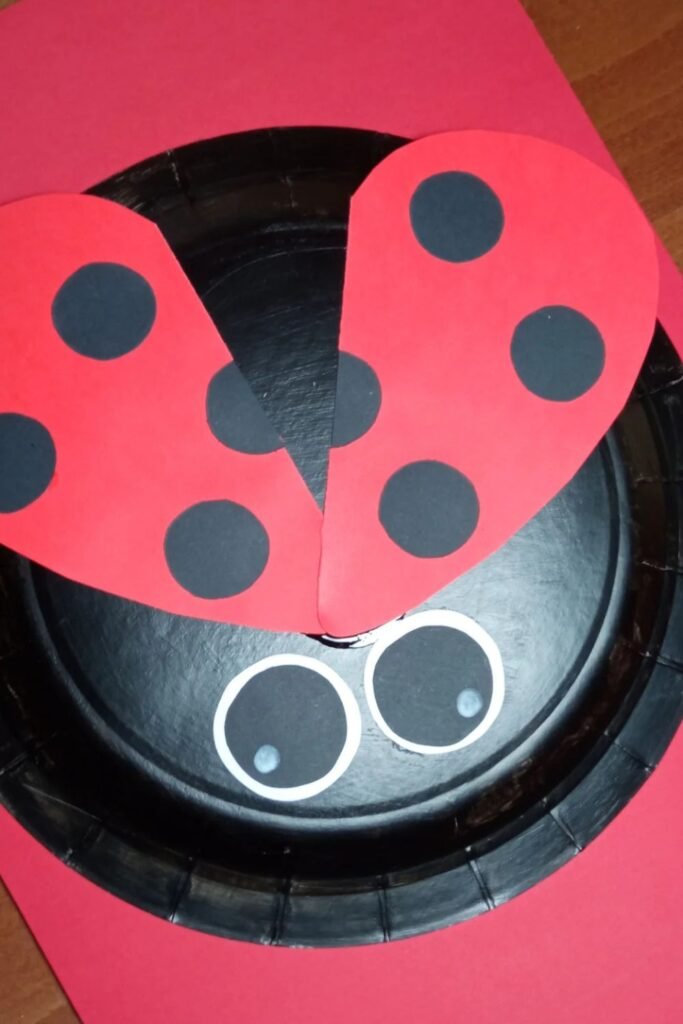
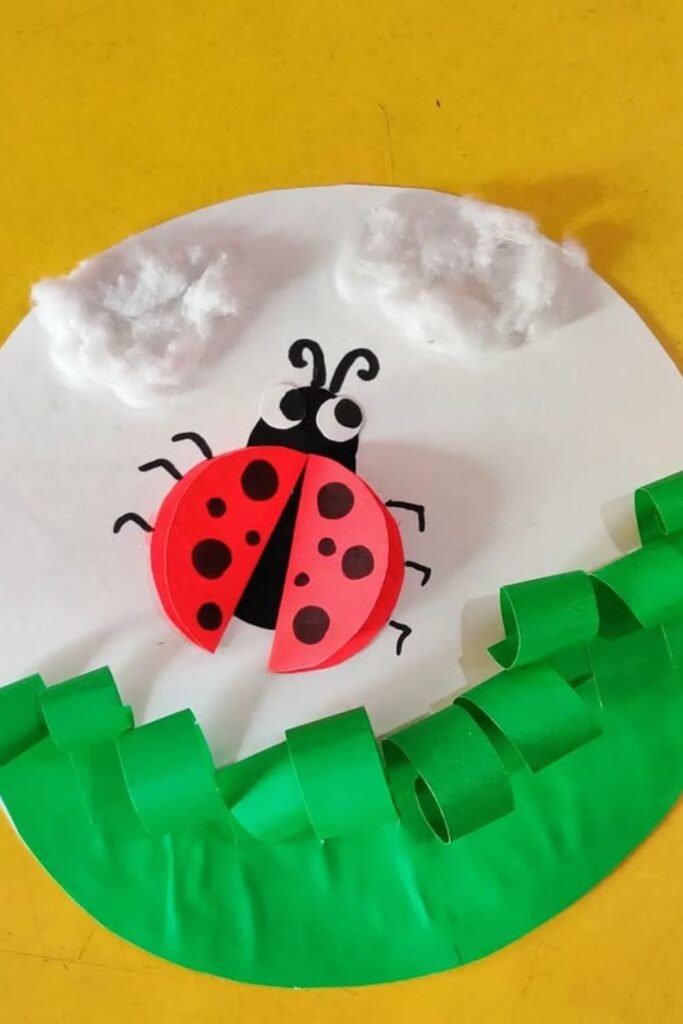
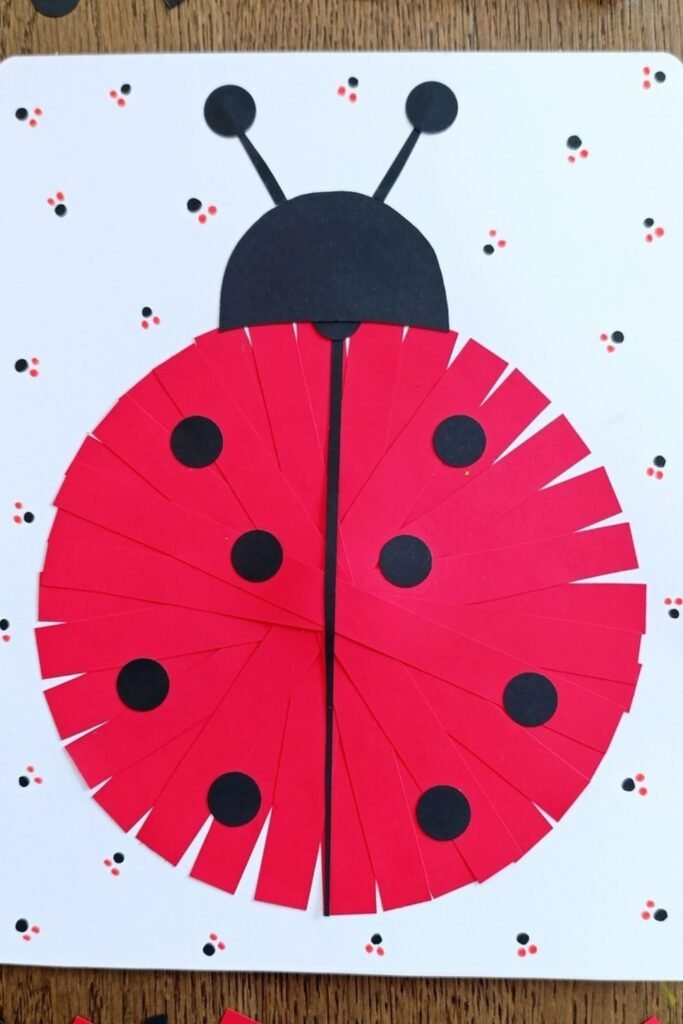
Paper Wings
Opening and closing those red wings does more than look cute it gives small hands a real workout.
Kids have to slow down and control their fingers when they fold the paper plate, paint inside the lines, and add small black dots.
Kids can focus on this kind of craft best when they are at home or in a school where they can take their time.
To make it again, keep the base basic and let the kids paint, dot, and separate the wings on their own.
Don’t try to repair paint that is uneven or untidy. Every mistake you make while moving is part of building your grip, coordination, and confidence.
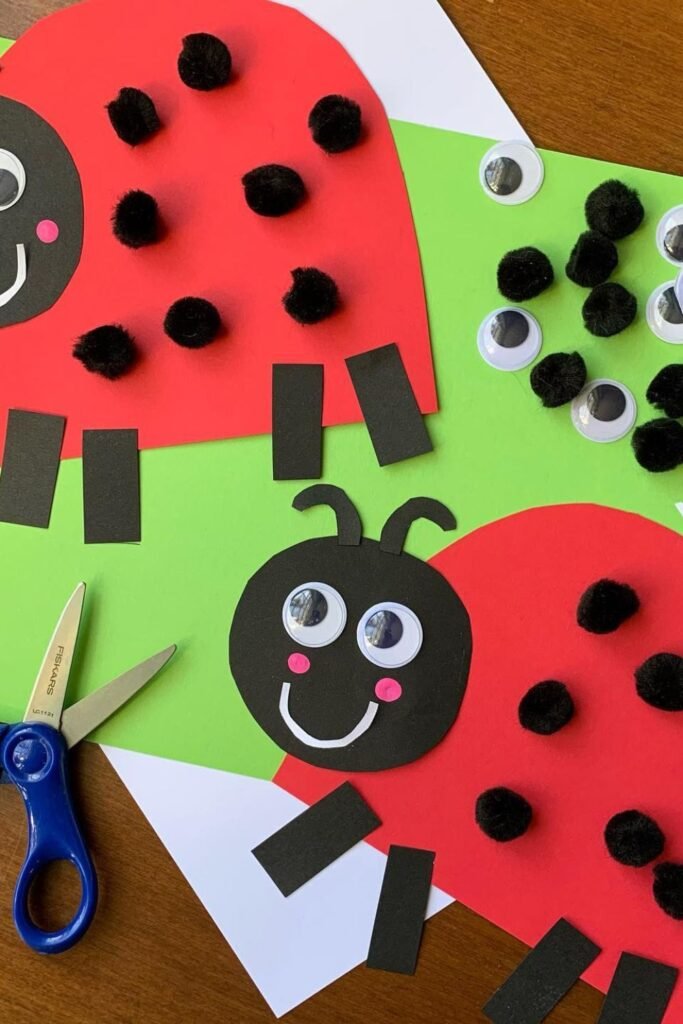
Pom Dots
Tiny hands get busy fast when soft pom-poms enter the picture. Picking them up one by one, placing them carefully.
And pushing them down builds finger strength without kids even knowing they’re doing it. This ladybug project is great for preschool centers.
Quiet nooks, or small group activities where focus is more important than speed. To make it again.
Get the basic shapes ready ahead of time and let the youngsters complete all the dot work.
Less is more here just show once and then step back. Every time you lose a pom-pom, it’s still good exercise for your fine motor skills.
Grass Collage
With a project like this, crowded tables make sense all of a sudden. Doing the same simple things again and over again.
Like cutting long strips of paper, pushing circles into position, and dotting places, keeps kids’ hands busy without overwhelming them.
This approach is excellent for classrooms or group craft days where everyone can work at their own pace but yet feel like they’re part of something bigger.
Make a background that everyone can use, and then let each youngster add their unique ladybug to the picture.
The goal is that no two locations will be the same.
The repetition gradually teaches control, patience, and hand strength, and the finished work feels like a group effort.
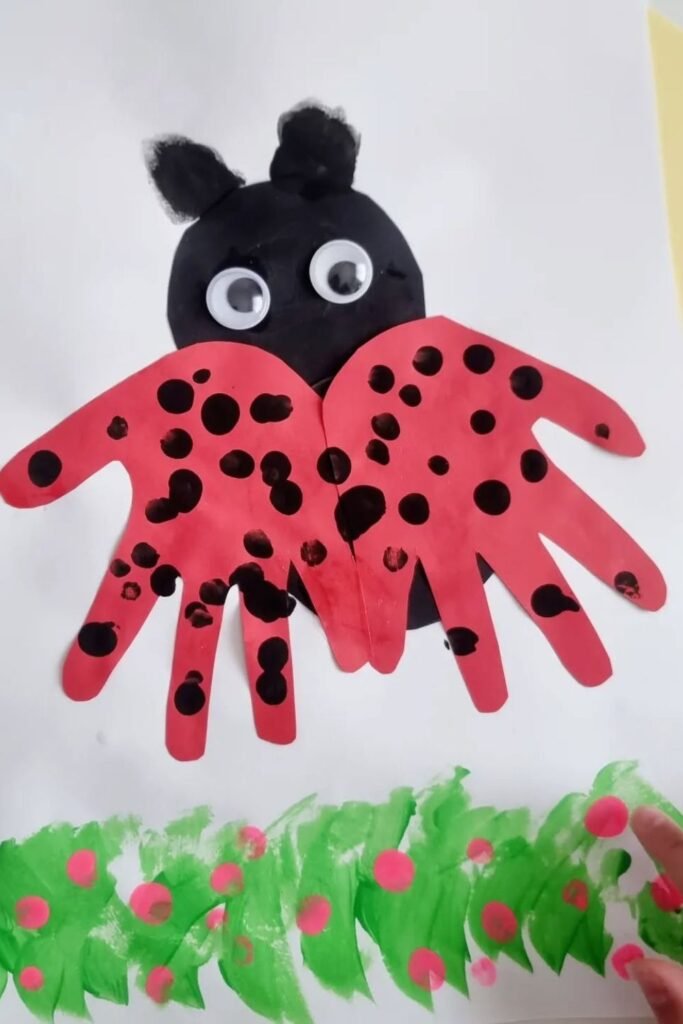
Hand Prints
Paint-covered palms turn into instant motivation here. Pressing hands down, lifting carefully, and lining up the prints takes coordination.
Kids don’t even know they’re practicing. This game is great for younger kids who have trouble with scissors but still need to use their hands a lot.
Set it up during art time when it’s okay to make a mess and not too much is expected. Use thick paint to make it again.
And let the youngsters decide how hard to press and where to put their hands. Don’t bother correcting prints that aren’t even or have smudges.
The true benefit comes from spreading your fingers, putting pressure on them, then taking your hands away cleanly just the kinds of actions that little muscles need to get stronger.
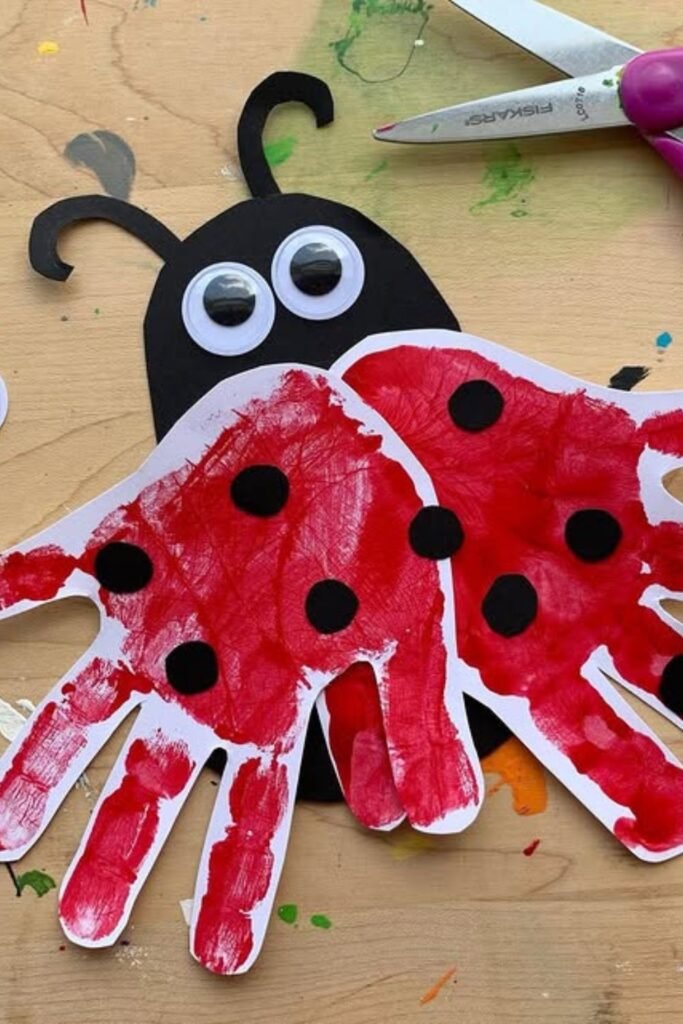
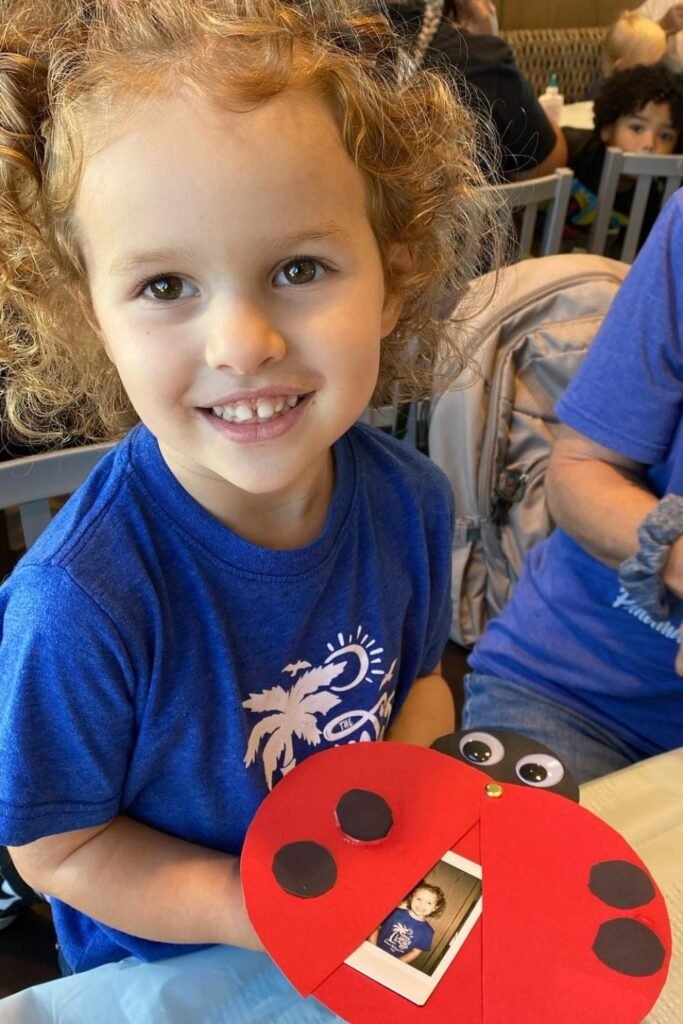
Photo Keepsake
Hidden surprises instantly change how carefully kids work. Opening the wings to reveal a photo makes every step feel important.
From putting the circles in order to pressing the spots into place.
This craft is great for family days, special celebrations, or school assignments that need to be taken home.
To make it again, use a basic paper fastener so the wings can open and close easily. Then let the kids decorate it before you put the picture in.
Taking your time to make sure the wings touch correctly increases control without adding stress.
The combination of movement and meaning keeps hands occupied and minds focused longer than normal.
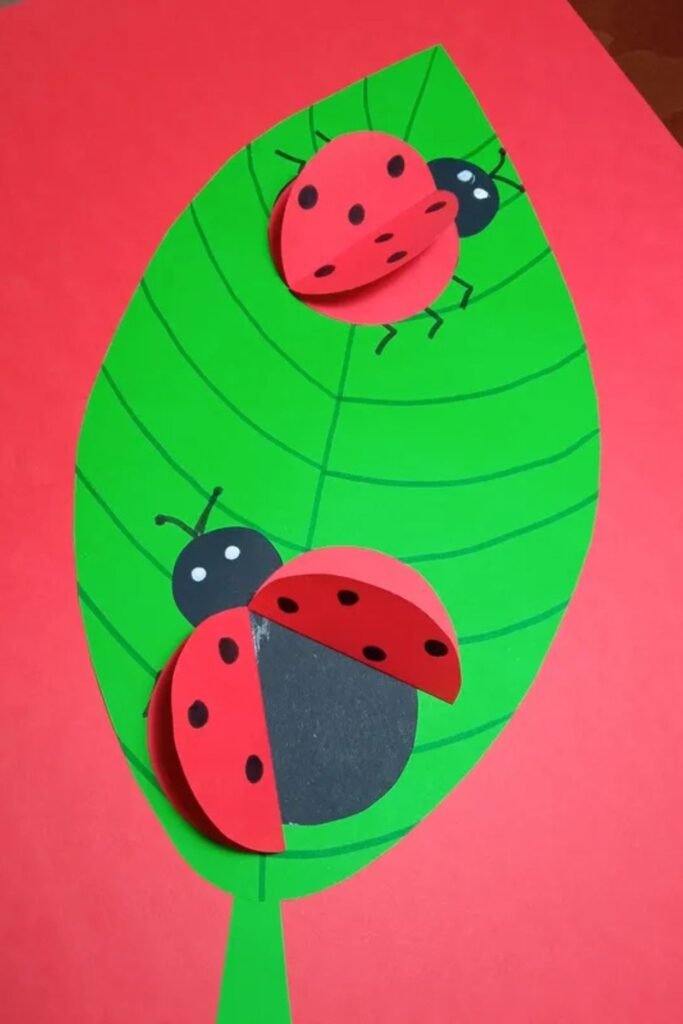
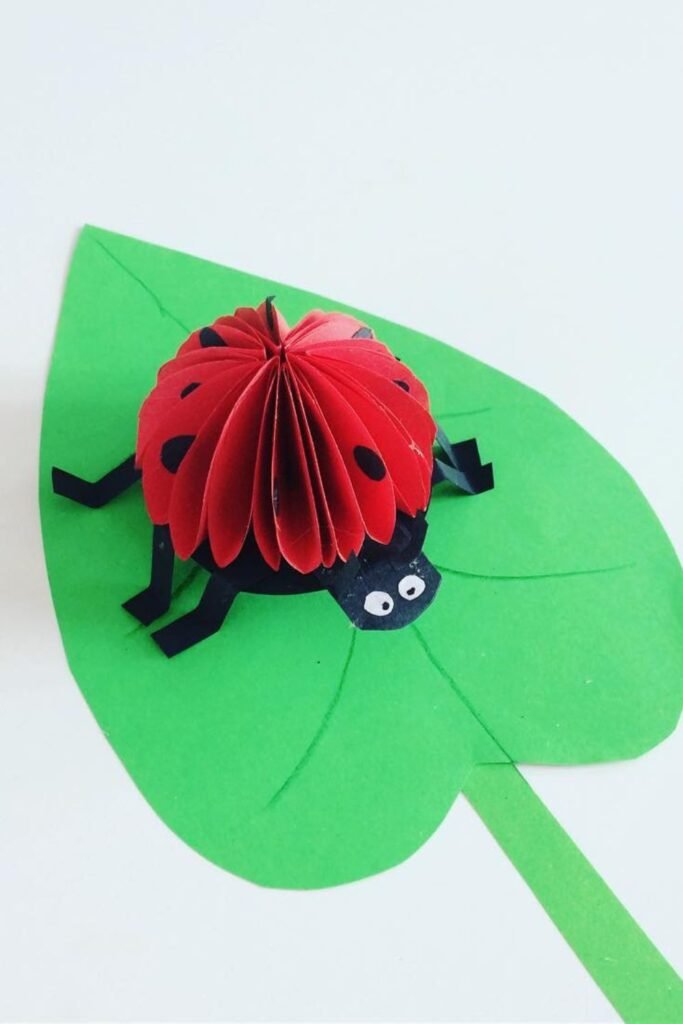
Leaf Layers
Depth changes everything when paper starts lifting off the page. Folding wings forward, lining them up at the center.
And pushing on each seam makes it harder for fingers to work against. This approach works great for nature units or spring themes.
When kids are already talking about bugs and leaves. Cut the leaf form out ahead of time so that the kids can focus on folding, gluing, and putting things in the right places.
Drawing the veins in the leaves gives you more control without making you feel more stressed.
The little folds and careful placements softly teach precision, and the finished product feels more like art than practice.
Heart Wings
Opening wings shaped like hearts instantly slows kids down in a good way. Matching both sides, lining up the center.
And putting the pieces together takes more skill than a flat craft. This idea is great for quiet table work, Valentine’s Day activities, or small groups.
Who require structure but not too much pressure. To make it again, use a paper plate as the base and cut out the heart wings ahead of time.
Then, let the kids do all the gluing and placing. Tell them to stop before they glue so the wings fit together well.
That little bit of time spent adjusting teaches hand control, focus, and patience without making the craft a lecture.
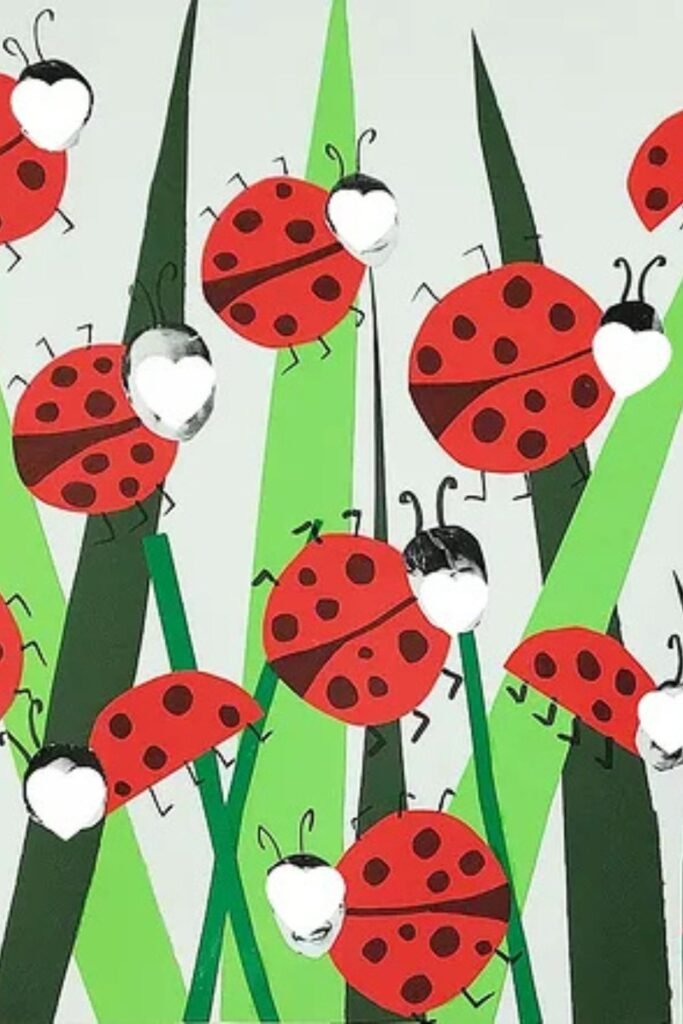
Heart Garden
Colorful repetition pulls kids in without needing extra instructions. Folding small wings, pressing circles into place.
And lining up ladybugs in pairs of heart shapes keeps fingers busy with short, controlled actions.
This arrangement is great for group crafts, bulletin boards, or gifts that kids can take home, where each child makes one piece.
To make it again, get the heart bases and body shapes ready, and then let the kids focus on folding and sticking. Instead of speed, encourage slow placement.
Kids may see how far they’ve come by seeing a lot of similar pieces together.
The repeated motions also gently increase finger strength, coordination, and confidence.
Cut Practice
Straight cuts rarely excite kids, but curved wings change the game. Snipping along rounded edges, stopping at the center line.
By changing the location of your hands helps you learn how to use scissors without training.
This game is great for the first few weeks of preschool or kindergarten while kids are still getting used to cutting.
To make it again, lightly draw the outline of the ladybug and let the kids cut it out themselves, even if the lines don’t match up perfectly.
Moving your hand open and closed improves the muscles in your hand, and keeping the paper still helps you get better at writing later.
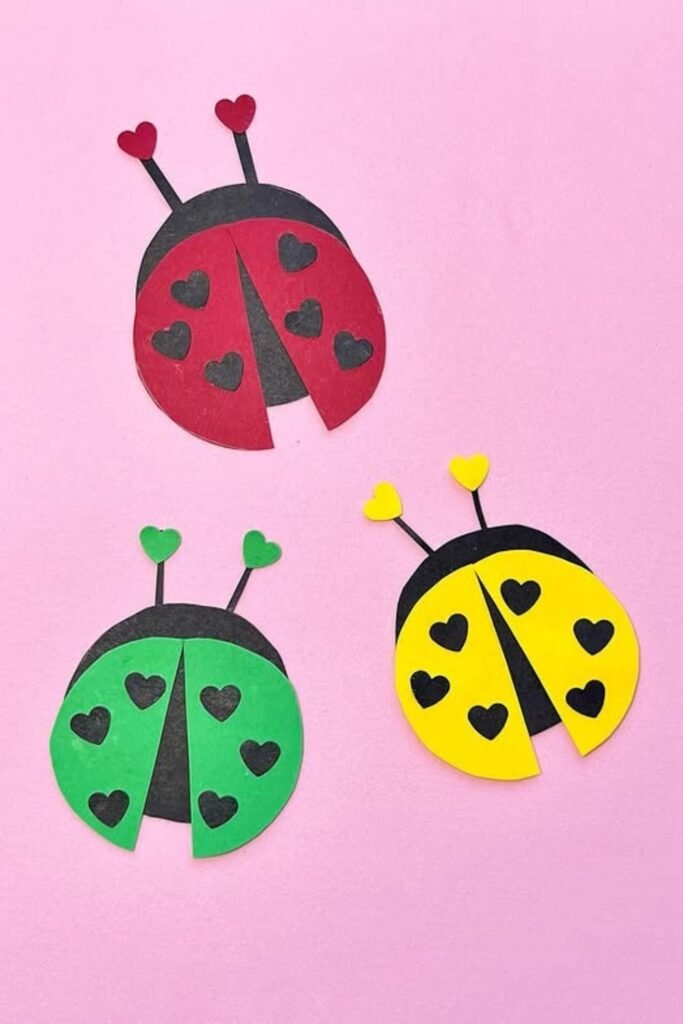
Color Hearts
Bright wings paired with tiny heart details naturally slow kids down. Pressing small shapes into place, lining them up across both sides.
And making sure they are equally spaced takes more management than it looks like. This activity is great for quiet art times.
Valentine’s Day themes, or fine motor stations where focus is more important than speed. Cut out the major body forms ahead of time.
And then let the youngsters put the hearts and antennas in place. Using little glue dots instead of liquid glue keeps your hands calm and your movements planned.
Those cautious presses and changes build your finger and strength with out making finished ladybug feels less fun and intimate.
Paper Loops
Rolling paper into even loops keeps fingers busy in the best way. Curling, holding the shape.
And pressing each strip into place takes patience. And control that younger kids need to work on.
This activity is great for spring or bug themes when you want to do more than just flat gluing. Cut the green strips ahead of time.
Let the kids do all the looping themselves to make it again. It’s okay if some loops are tight and others are loose.
Doing the same thing over and over again builds grip and coordination, and the end scenario feels more like play than work.
Accordion Fold
Layered paper instantly raises the challenge level in a good way. Folding the same shape over and over, lining edges up.
and pushing each wrinkle firmly tells fingers to work carefully instead of quickly.
This craft is appropriate for older preschoolers or youngsters in early elementary school.
Who are ready for tasks that require greater control. To make it again, stack a few wing forms, fold them together.
And attach only the middle so the body spreads out. It’s more important to keep the folds even than to make them look good.
That folding process over and over again builds the muscles in your hands and helps you get better at being accurate. The final ladybug looks almost like a sculpture.
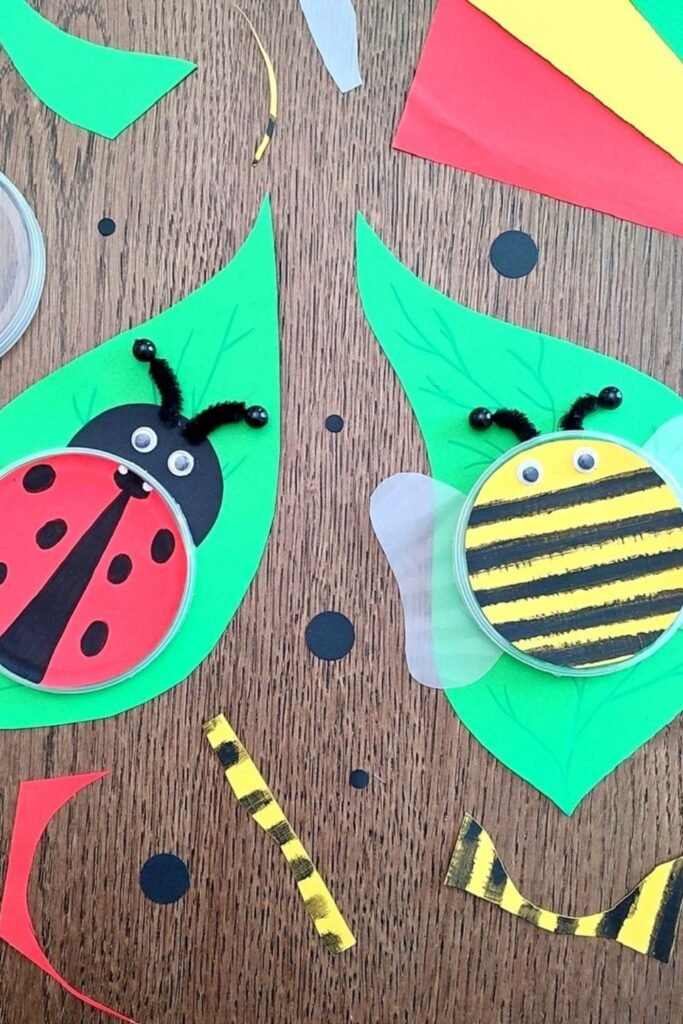
Lid Frames
Clear plastic lids make precise placement the most difficult part right away. Holding the circle steady, lining it up.
And pressing decorations underneath all need fingers to slow down and work together. This approach is great for groups with kids of different ages.
Since the younger kids can decorate while the older kids make sure everything is in the right place.
To make it again, first cut out the leaf forms. Then, let the youngsters use paint, dots, or stripes to make the insect bodies within the lid.
That steady grip and careful decoration work together to improve coordination in a way that flat paper crafts normally don’t.
Finger Stamps
Dipping one fingertip at a time instantly changes how carefully kids move. Pressing dots onto painted wings asks for control.
Spacing, and just enough pressure to produce a mark without smudging. This activity is great for youngsters.
Who need to slow their hands down after doing something huge, like making handprints. To make it again, paint the wings first and let them dry a little.
Then, use your fingertips to make the spots and background elements. Encourage one finger, not the full hand.
Changing from huge motions to little taps helps toddlers learn how to control their movements instead of racing through.
Wall Bloom
Mass placement turns patience into the real skill here. Picking up small pieces, turning them the right way.
Kids have to slow down their hands and think about what they’re going to do as they press each one into a tight sequence.
This kind of craft works best when everyone adds a few ladybugs at a time, either as a group activity or as a long-term school display.
To do it again, keep the ladybug shapes simple and let the youngsters focus on where they are instead of how fast they are.
Working around a shared core naturally teaches how to space things out and govern them.

Strip Layers
Stacking thin paper strips forces hands to slow down and work with intention. Lining each strip toward the center, adjusting angles, and pressing.
Things flat builds control that scissors alone don’t teach.
This activity is great for fine motor stations or quiet classroom activities where students can focus and not rush.
Cut the strips ahead of time and let the kids choose where to put them and how far apart they should be.
Some will overlap more than others, and that’s okay. The minor changes pinching, rotating, and pressing are what really work.
They immediately develop finger muscles and coordination, yet the last ladybug still feels daring and satisfying.
Cardboard Build
Thick materials change how kids use their hands right away. Holding cardboard steady, pushing paint across a rough surface.
And aligning up wings with a fastener takes more strength and control than paper ever would.
This project is appropriate for toddlers who are a little older or kids in the early grades who require a challenge that still seems like fun.
To make it again, cut out the main body form ahead of time, but let the kids put it together, paint it, and put the spots on.
Putting a brad or split pin on the wings makes them harder to open and close.
That extra work makes your grip, coordination, and wrist control stronger in a very natural way.

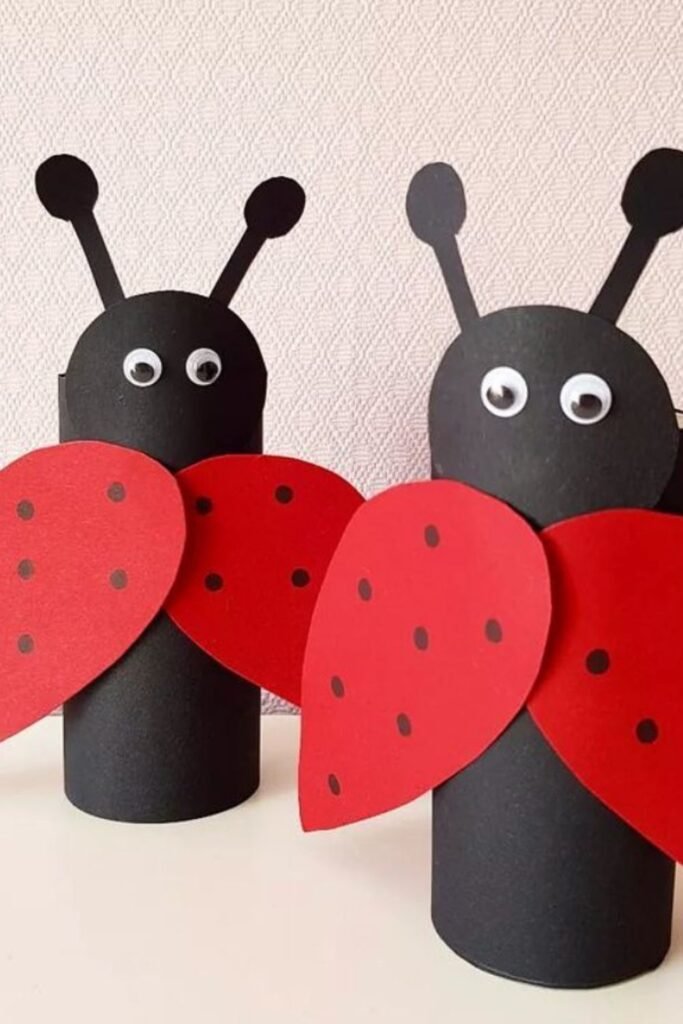
Tube Bugs
Standing crafts change how kids use their hands right away. Wrapping paper around a tube, holding it in place.
It takes more skill to line up wings on a curved surface than it does to work on a flat table.
This project is great for small groups or shelf activities where kids can move the insect around and change things as they go.
To make it again, hold the paper loosely at first so the youngsters can move it around before pressing it down.
The final ladybug can be used as a fun desk buddy while you turn, grip, and steady the tube to build hand strength.
Paper Loops
Curling paper into soft loops turns simple strips into serious hand practice. Rolling each piece, holding the shape.
And pressing it down takes time that younger youngsters are still learning. This exercise is great for spring themes or bug units.
When you want to add extra texture without making things harder. To make it again, cut the green strips ahead of time and let the kids do all the looping.
Some loops will rise up, while others will flatten down. That’s okay. Doing the identical curl-and-press motion over.
And over again strengthens and controls your fingers. The end scenario feels more fun than organized.

Guided Placement
Focused fingers tell the whole story here. Lifting each spot, turning it the right way, and pressing it onto a small target slows.
kids down naturally without saying anything to them out loud. This setup is great for one-on-one time or small groups.
When you need to give mild supervision. To make it again, keep the base simple and give the kids the small pieces one.
At a time so they can put them together. Instead of repairing, pointing lets them change things on their own.
That cadence of pause think press fosters coordination, focus and confidence much better than racing through a final look.
FAQs
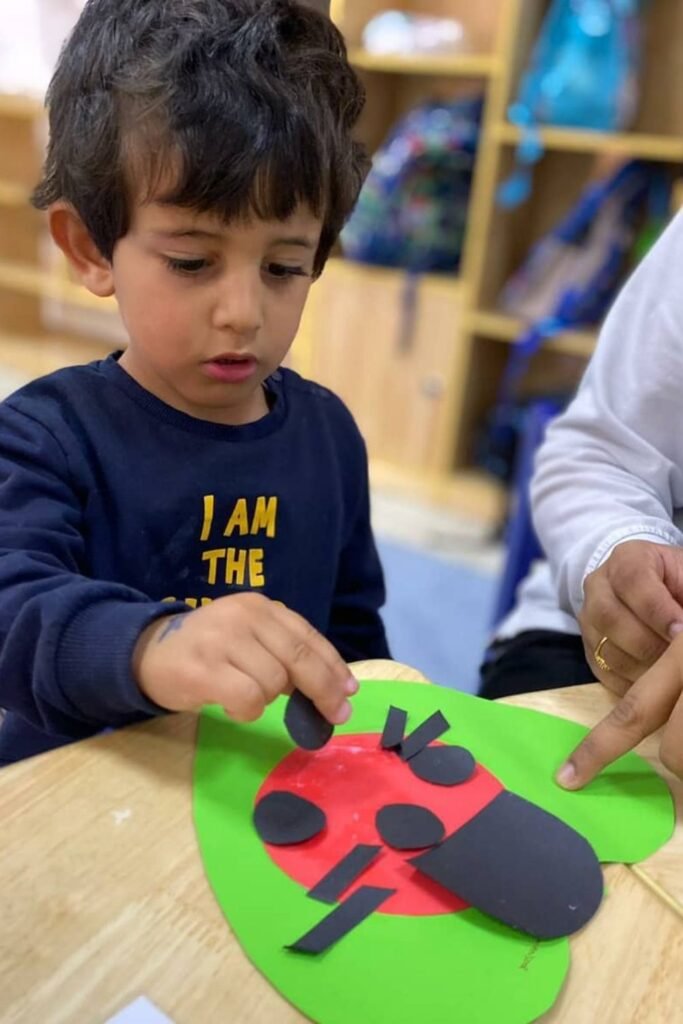
How do I know if a ladybug craft is actually helping fine motor skills?
The craft is working if a youngster is pinching small pieces, moving things around, opening and closing scissors, or slowing down to press something carefully.
How nice it seems at the end doesn’t matter as much as how much effort, control, and practice you put into it.
What if kids get frustrated or keep asking for help during the craft?
That usually means the task is challenging enough to be helpful.
Instead of mending things for them, split the craft down into smaller parts or use bigger pieces for short time.
After their hands have warmed up, add the little elements back in.
Kids make progress when they have to work hard, but not so hard that they want to give up.
Hi, I’m Afaf! I’m a law student who loves writing about everyday life – from home projects and crafts to fashion, beauty, and parenting tips.
I’ve been writing for over a year, sharing ideas that are simple, practical, and easy to try. I write about things I find interesting and useful, whether that’s organizing a space, trying a new DIY, or finding activities to keep kids entertained.
My goal is to share helpful ideas without making things complicated. If it works in real life, I’ll write about it.
When I’m not studying or writing, I’m usually experimenting with new projects or scrolling for inspiration!