
How To Make Frog Craft With Paper: The Ultimate Step-By-Step Guide
I sat down with some colored paper the other day, not really planning anything special, and I ended up making the cutest little frog craft.
It started off as one of those “let’s just try something easy” situations, but it grew into a fun little project that anyone can accomplish.
Especially youngsters. You don’t need anything fancy, just some paper, scissors, and a little bit of time.
If you’ve ever attempted making anything out of paper and felt they were too hard, this is a nice option.
It’s easy to do, a little messy in a good way, and at the end, it looks pretty cute. Let me show you how I made mine step by step.
Let’s jump in!
Why Does My Frog Tear or Get Damaged While Folding?
You aren’t the only one who has problems with your paper frog ripping or looking a touch rough around the edges.
The first time I tried, I had the same difficulty. It usually depends on the type of paper and how hard you’re pressing it.
When you cut or move sections, the paper can break easily if it is too thin. But if you press too hard when shaping or pasting, the paper can break.
I also noted that cutting too quickly made my edges uneven, which caused small tears in the end.
Materials Needed:
- Green paper
- Brown / light orange paper
- White paper
- Black paper or marker
- Pencil
- Compass
- Scissors
- Glue
Step-By-Step Guide
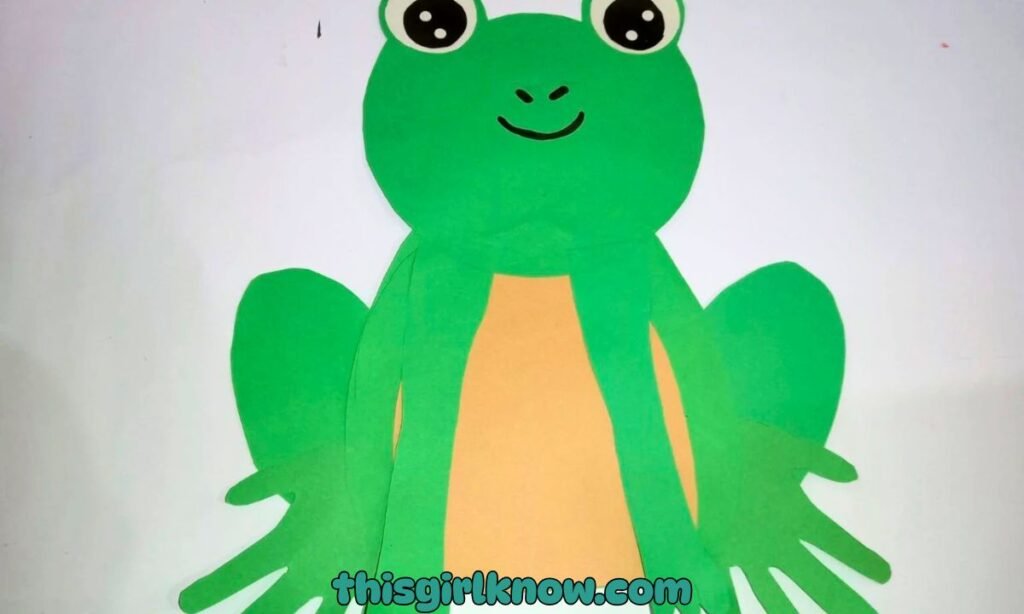
1. Draw the Frog’s Head & Body
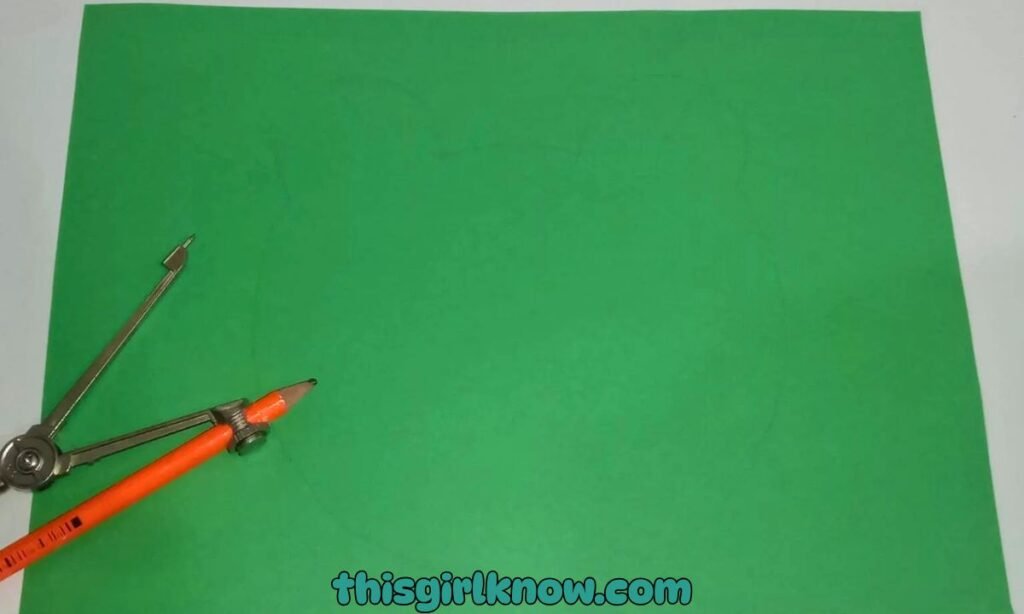
I began by sketching the frogs main shape gently on a plain green sheet of paper with a pencil.
I didn’t think about it too much because it was just a circular face with two small bumps on top for the eyes.
A compass can help you make a good round shape, but freehand works just as well.
It wasn’t quite symmetrical, but that’s okay because it still looked cute in the end. Don’t make this section of your frog too little or too hard.
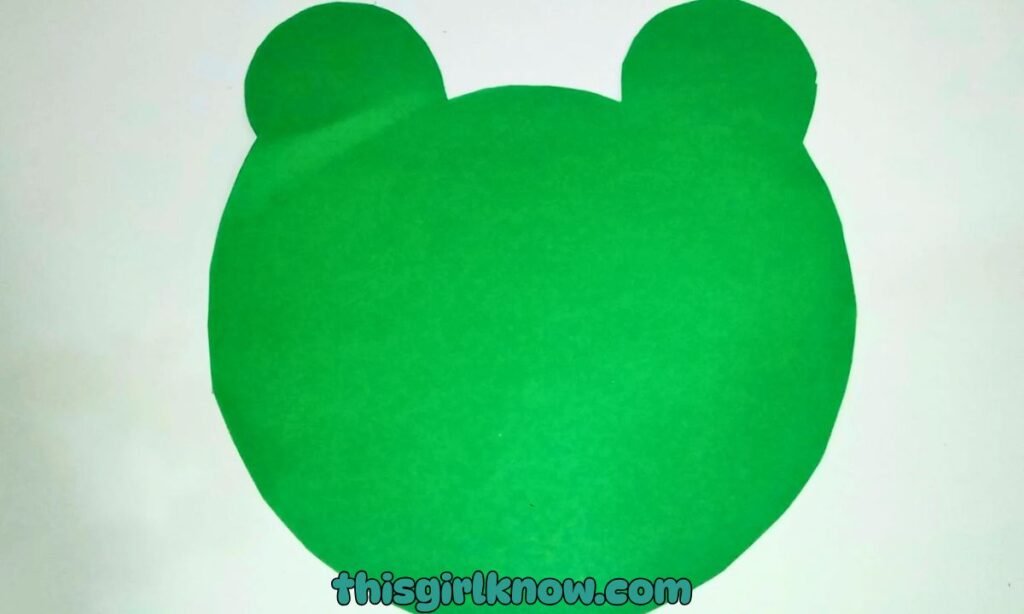
2. Cut out the shape
After I was delighted with the drawing, I cut it out. This step takes a while, especially around the curved edges.
And the little bumps on the eyes. I tried to cut slowly instead of rapidly, and it really helped keep the shape neat.
Don’t worry if the edges aren’t perfect; it still works. It’s easy to fix by cutting it a little.
Pro tip: Use small, controlled cuts instead of long ones. It gives you better control and prevents accidental tearing.
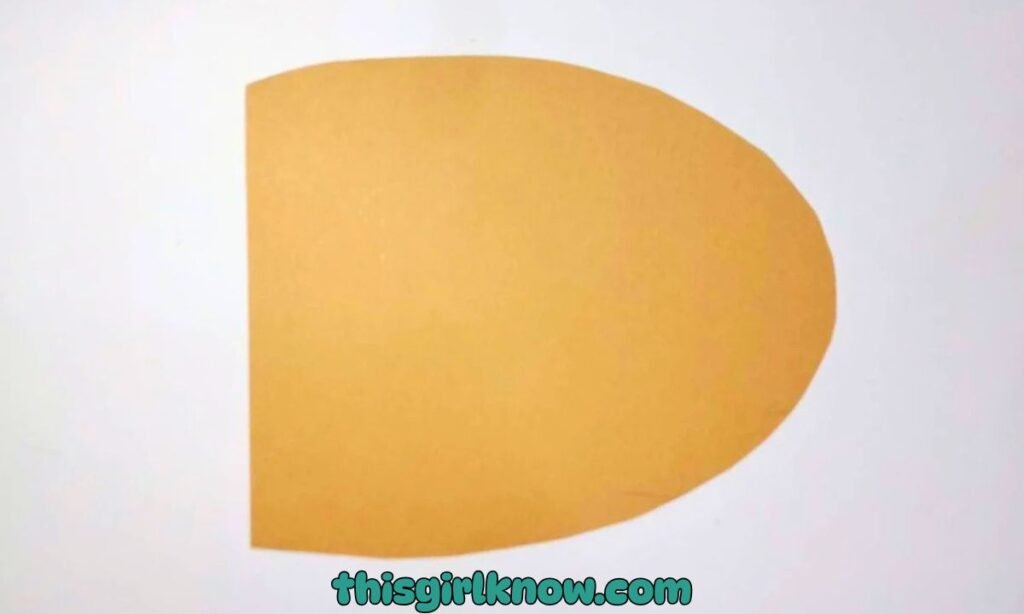
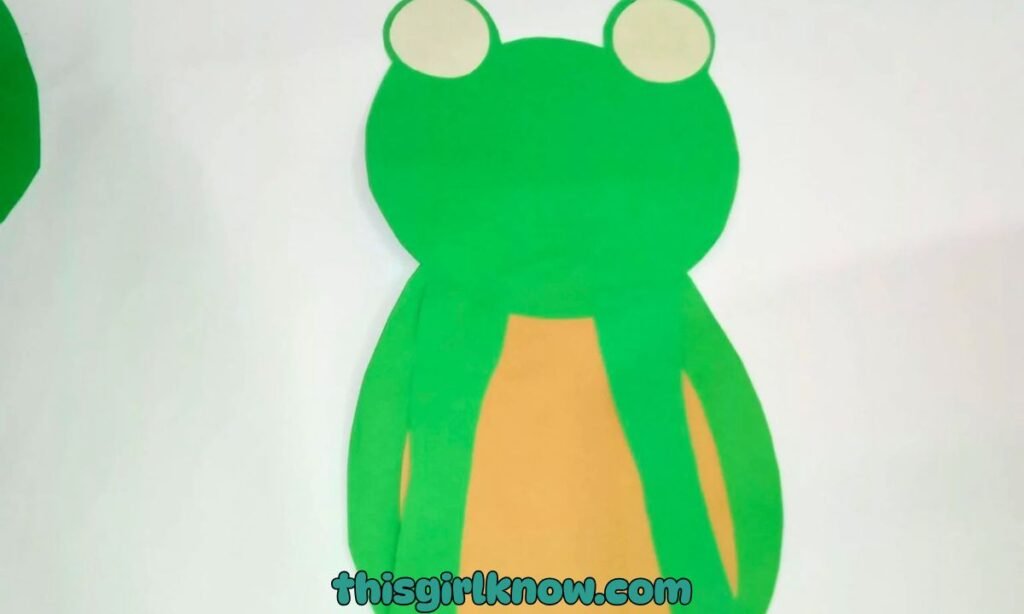
3. Cut Tummy Shape
Then I cut out an oval shape from a piece of brown paper to make the frog’s belly. Before cutting.
I pretty much held it against the body to get a rough notion of how big it was. At this stage.
The difference between the green and brown really made the frog come to life. Your oval doesn’t have to be perfect.
It still looks great when you wear it. This step is simple, but it makes the product look more polished and adds a nice touch.
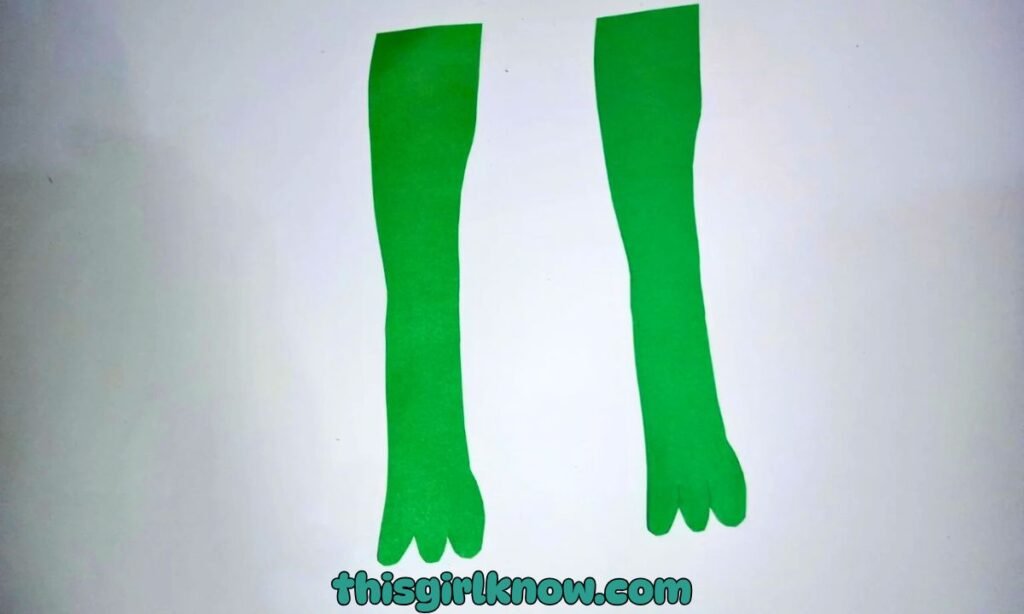
4. Cut Arms & Legs
I cut two long strips of the same green paper to make the arms and legs. I didn’t measure anything exactly.
I just made sure they weren’t too thin so they wouldn’t tear easily. You can bend or tilt them a little bit later.
When you’re done pasting to make them look more real. These strips may not look like much right now.
But when everything is put together, they help shape the frog and make it look more intriguing and alive.
5. Attach Everything
At this point, things began to make sense. I initially pasted the brown tummy to the middle of the body.
After that, I glued the green strips to both sides to make arms and legs. I moved them around a little bit.
Before I glued them down to see what looked best. You can either point them out or keep them straight. It’s up to you.
Pro tip: Don’t use too much glue here. A small amount keeps the paper from getting soggy or wrinkled.
6. Add the Front Leg Shapes
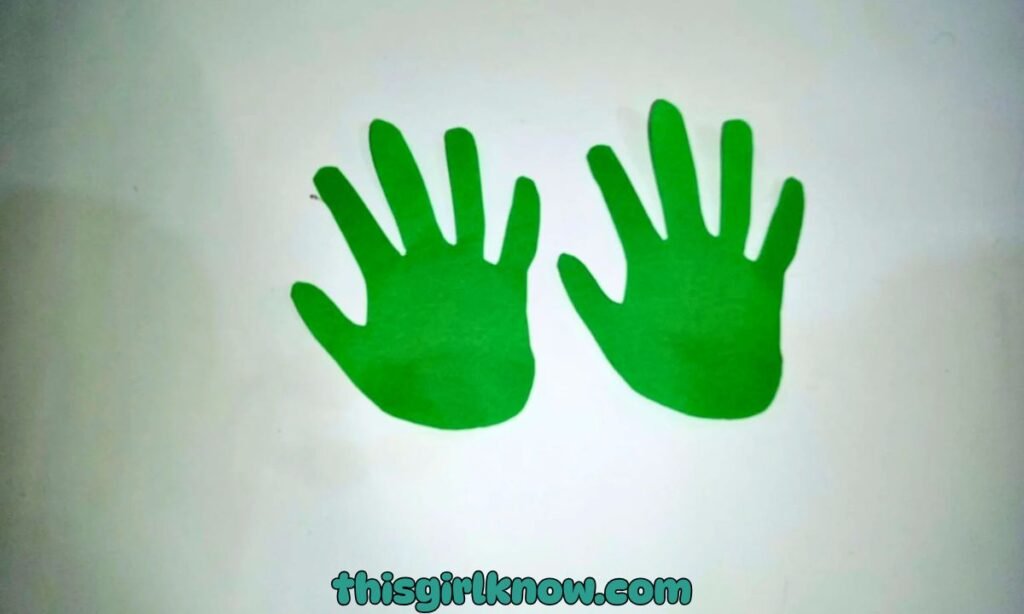
Then, I cut out two little green paper hands to make the front legs. It doesn’t have to be very complicated.
Simple round shapes are sufficient. I put them on the front bottom of the frog, where they were somewhat above the body.
This small tweak made a big difference. Since it gave the frog more character.
It began to appear like it was sitting instead of just being a flat shape on a sheet of paper.
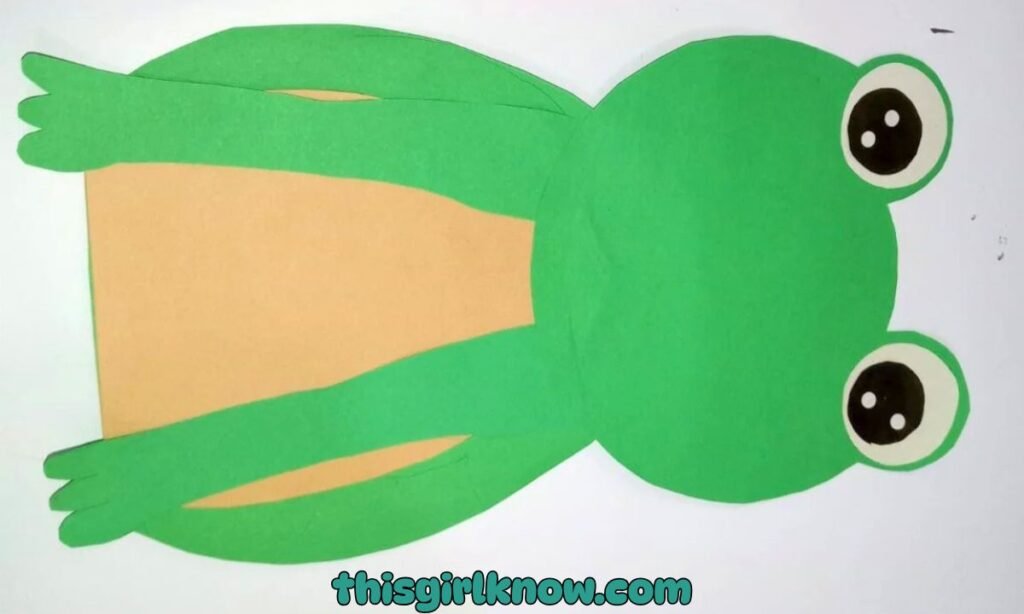
7. Make and Paste the Eyes
I made two circles out of white paper and then added smaller black circles on top of them for the eyes.
You can make them huge and a little off. That helps the frog look better. I put them on the top bumps we made earlier.
And to be honest, this was my favorite part since the frog looked like it was alive. You can even try googly eyes if you have them.
8. Draw the Smile and Nose
Finally, I used a marker to draw a simple smile and a small nose. This step is a lot of fun since you can make your frog look different.
I went with a big smile, but you could certainly try various styles. The lines aren’t perfect, which makes the workmanship more interesting.
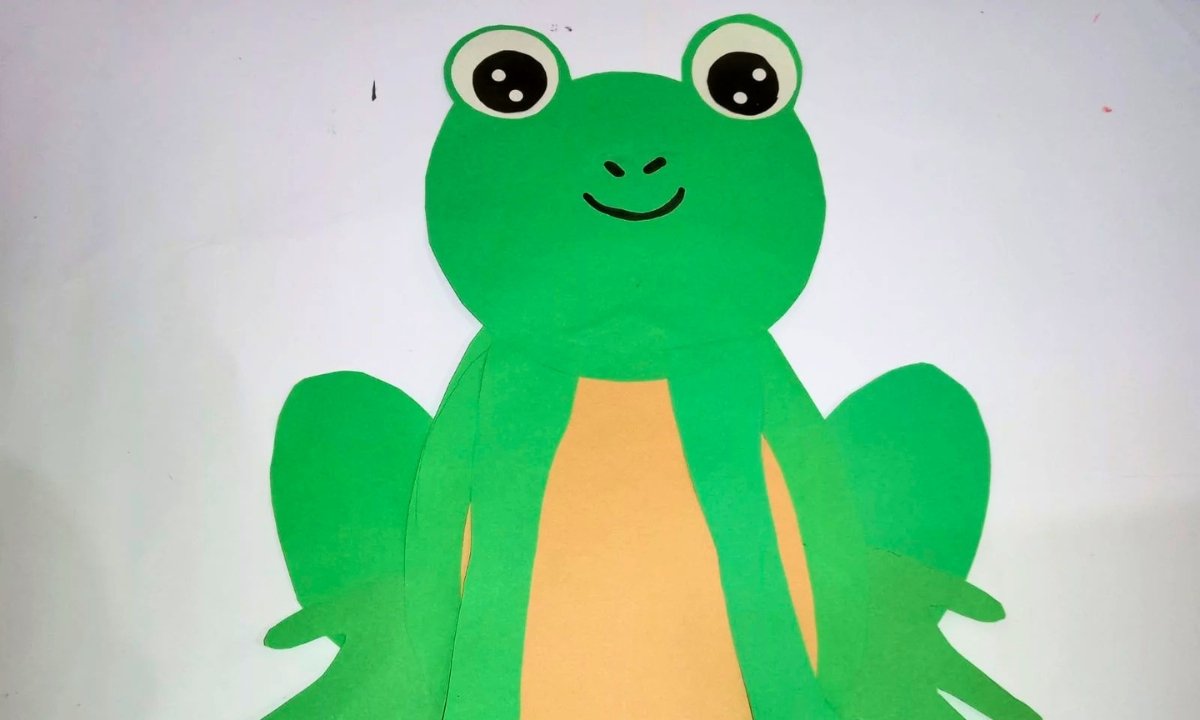
That’s all! Your frog is finished! Right now, it really seems like everything worked out.
Why is my Paper Frog not Jumping Properly?
If your paper frog isn’t jumping as you thought it would, don’t worry. At first, I was confused too.
This version is more of a cut-and-paste craft, so it doesn’t move like an origami frog. That said, if you’ve tried to construct a leaping version before.
The problem is usually that the folds are either too tight or not lined up right. If you make even a small mistake, it won’t work.
Thicker paper might also make it harder for the frog to jump. If you really want a frog that jumps, this method won’t work.
How can I make my paper frog look cuter and more realistic?
This is the most fun part since you can be creative and make your frog look any way you want. When I made mine.
I found that small things may have a great impact. For example, enlarging the eyes a bit broader right away makes the face look better.
And putting them a little off-center makes them look more charming. You may also make the edges of the body round.
Instead of sharp to make it look softer. I included little details like blush rings on the cheeks to make the frog look more real.
FAQs
Can I make this frog craft without glue?
You can simply make something cleaner or less messy without using glue. You can hold the pieces in place.
With double-sided tape or by folding up small tabs instead of gluing them. I’ve tried both approaches.
And tape works really well, especially if kids are making it and you want to keep the table clean.
What can I use if I don’t have colored paper?
Don’t worry if you don’t have any colorful paper. You can still do this activity. You can use crayons, markers.
Or watercolors to color plain white paper. I did this with my kids once, and they liked.
Coloring it better than cutting it. You can also alter your frog in any manner you choose.

Hi, I’m Afaf! I’m a law student who loves writing about everyday life – from home projects and crafts to fashion, beauty, and parenting tips.
I’ve been writing for over a year, sharing ideas that are simple, practical, and easy to try. I write about things I find interesting and useful, whether that’s organizing a space, trying a new DIY, or finding activities to keep kids entertained.
My goal is to share helpful ideas without making things complicated. If it works in real life, I’ll write about it.
When I’m not studying or writing, I’m usually experimenting with new projects or scrolling for inspiration!